2
Fliesen 3D Laser CONDTROL.
УКАЗАНИЯ ПО ТЕХНИКЕ БЕЗОПАСНОСТИ
Внимание!
ОПИСАНИЕ ПРИБОРА
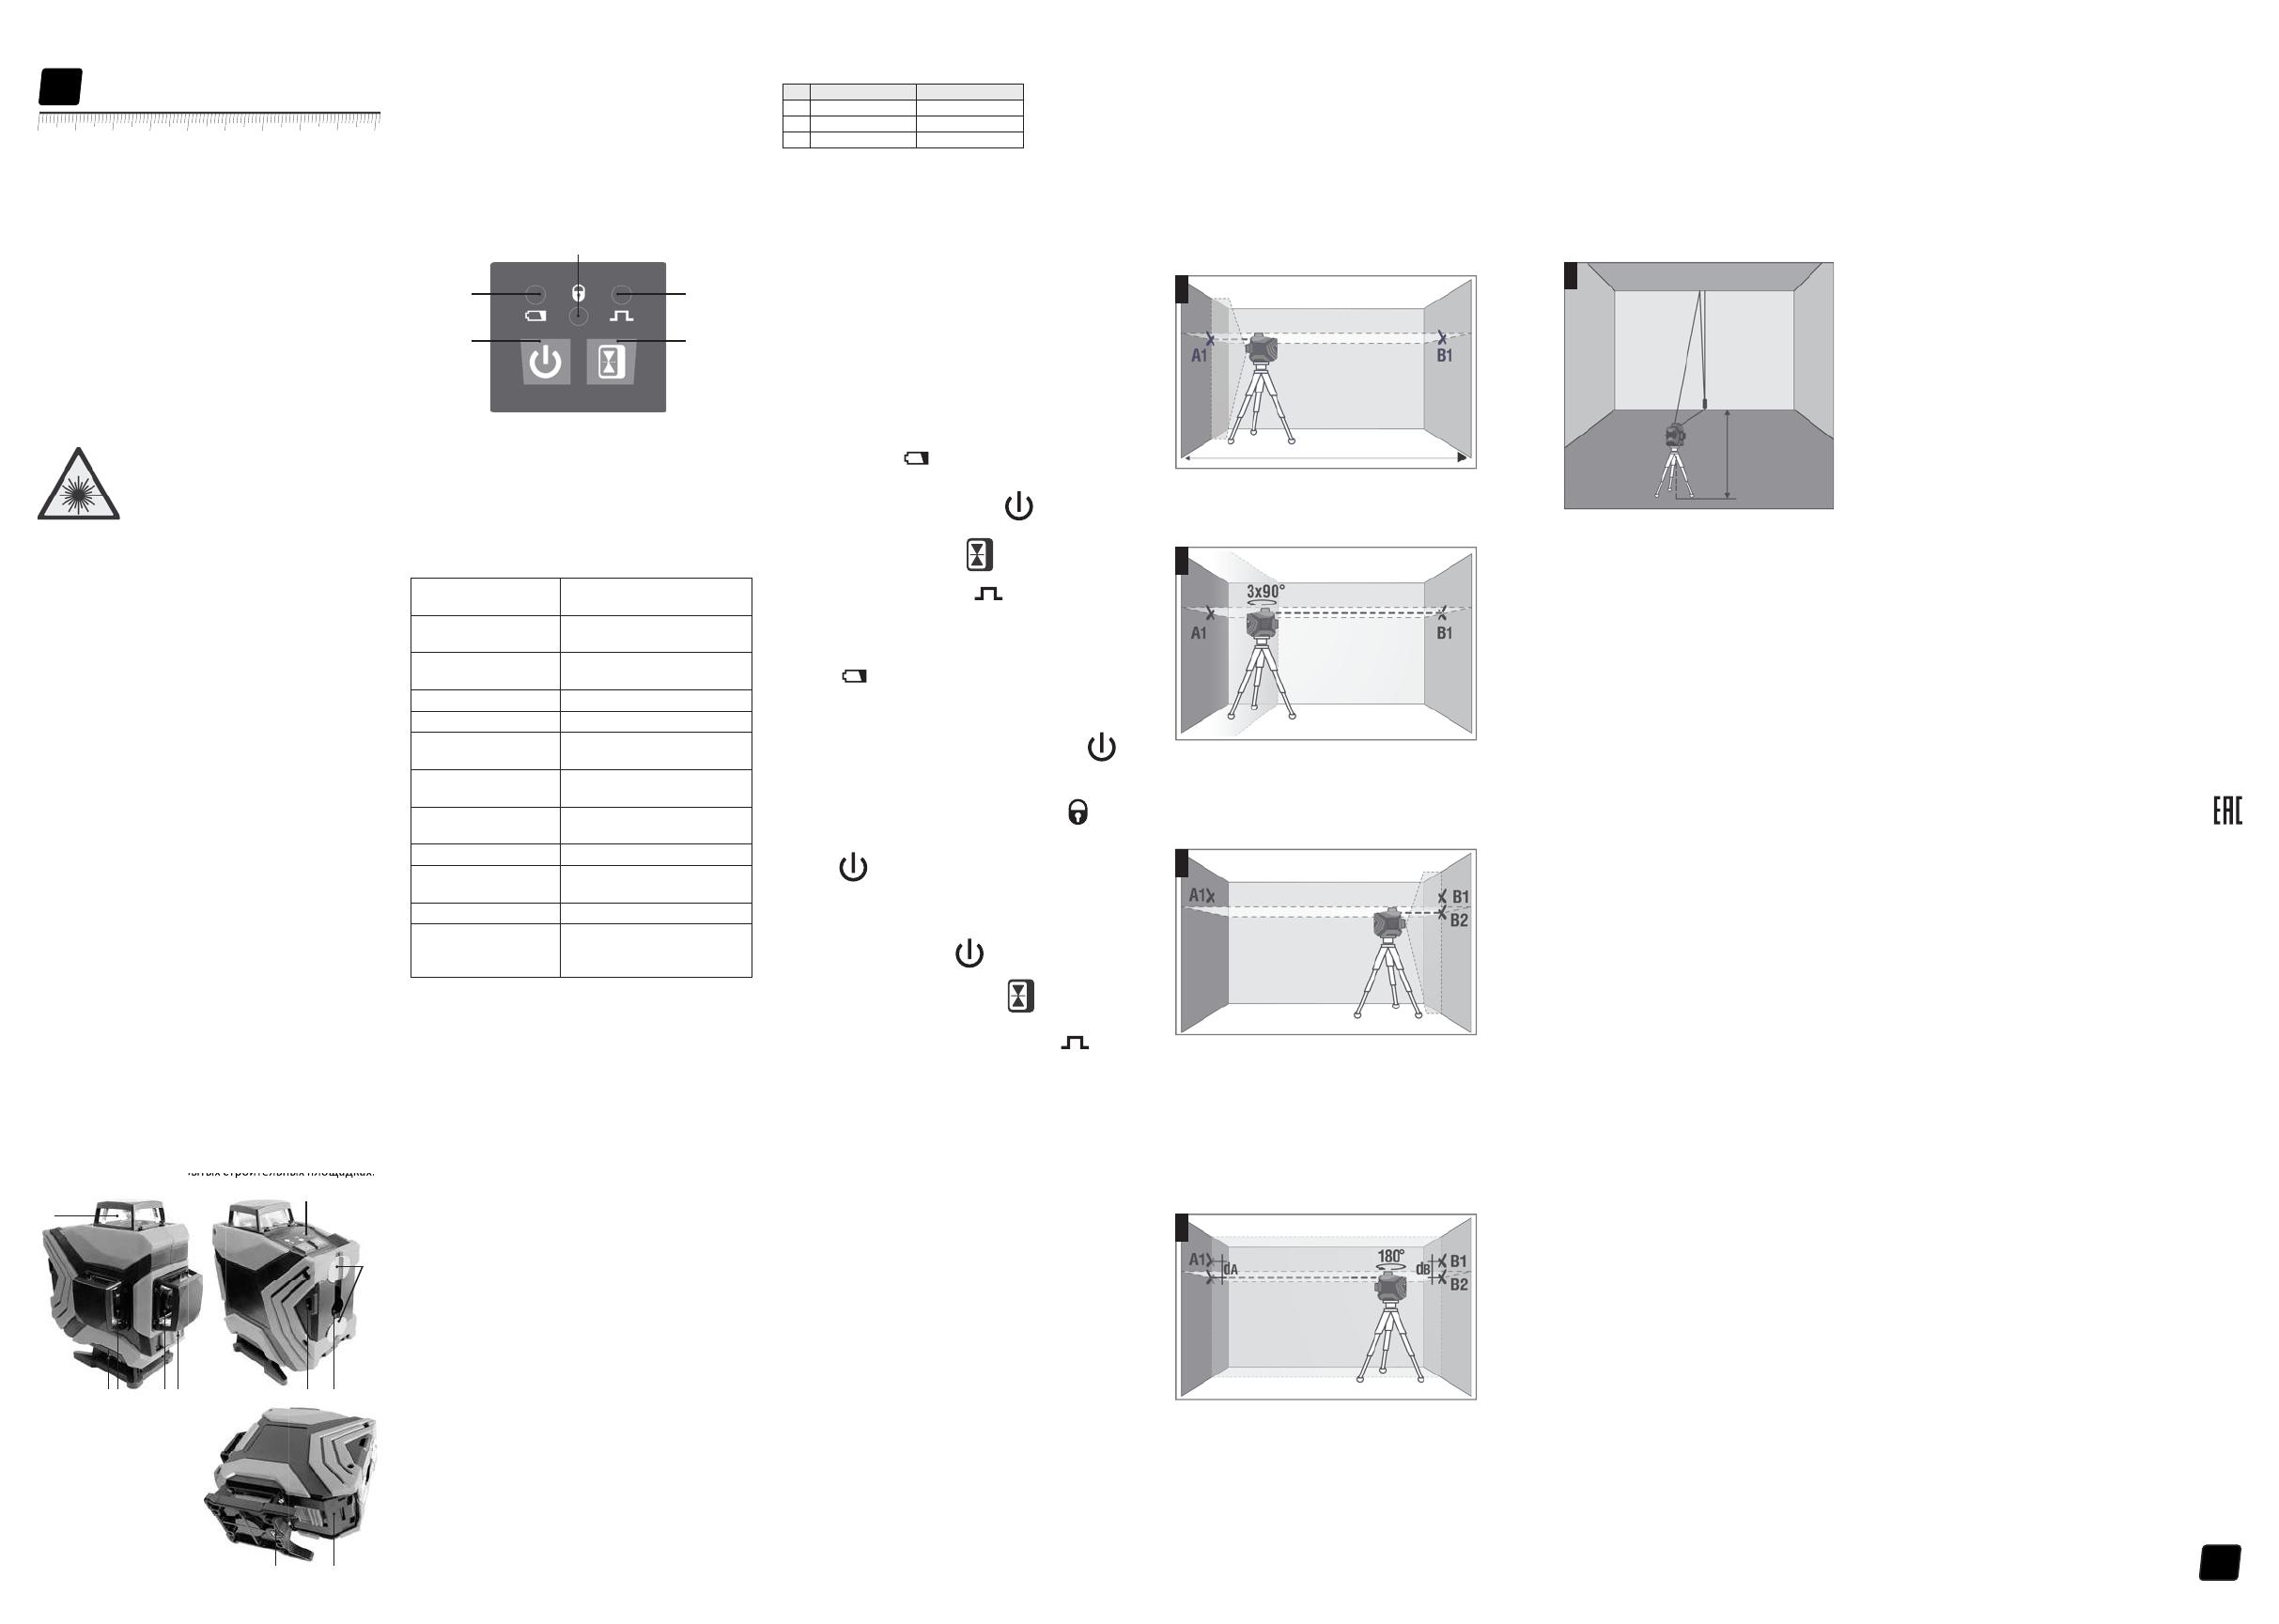
Панель управления
ТЕХНИЧЕСКИЕ ХАРАКТЕРИСТИКИ
± 5°
-10°C ... +50°C
90%
IP54
1/4’’
КОМПЛЕКТАЦИЯ
ПОДГОТОВКА К РАБОТЕ С ПРИБОРОМ
Питание прибора
Установка/зарядка литий-ионного аккумулятора
Проверка вертикали
IEC 60825-1: 2007-03
1
2
32A
Внимание:
РАБОТА С ПРИБОРОМ
1) Режим автоматической компенсации
ON.
OFF.
2) Режим построения наклонных плоскостей
OFF.
Внимание:
ПРОВЕРКА ТОЧНОСТИ
Проверка горизонтали
Внимание:
1
3 5
2
4
5м
A
B
C
D
1.5м
E
Руководство пользователя
Лазерный нивелир
RU
Fliesen 3D Laser
УХОД И ЭКСПЛУАТАЦИЯ
Внимание!
Соблюдение следующих рекомендаций продлит срок
службы прибора:
Несоблюдение следующих правил может привести к
вытеканию электролита из элементов питания и порче
прибора:
ГАРАНТИЙНЫЕ ОБЯЗАТЕЛЬСТВА
УТИЛИЗАЦИЯ
Только для стран-членов ЕС:
СЕРВИС И КОНСУЛЬТАЦИОННЫЕ УСЛУГИ
1 1 51
2
6
87
34
1


