Microlife PF 100 Инструкция по применению

Категория
Измерительное, тестовое и контрольное оборудование
Тип
Инструкция по применению
IB PF 100new VarB 1111
Europe / Middle-East / Africa
Microlife AG
Espenstrasse 139
9443 Widnau / Switzerland
Tel. +41 / 71 727 70 30
Fax +41 / 71 727 70 39
www.microlife.com
Asia
Microlife Corporation.
9F, 431, RuiGang Road, NeiHu
Taipei, 114, Taiwan, R.O.C.
Tel. 886 2 8797-1288
Fax.886 2 8797-1283
www.microlife.com
North / Central / South America
Microlife USA, Inc.
1617 Gulf to Bay Blvd., 2nd Floor Ste A
Clearwater, FL 33755 / USA
Tel. +1 727 442 5353
Fax +1 727 442 5377
www.microlife.com
Read the instructions carefully before using this device.
Перед использованием прибора внимательно прочтите данное руководство.
Przed rozpoczęciem eksploatacji należy dokładnie zapoznać się z niniejszą
instrukcją obsługi.
Az eszköz használata előtt gondosan olvassa végig ezt az útmutatót.
Microlife PF 100
Electronic Asthma Monitor
Instruction Manual (1-15)
Электронный прибор для контроля астмы
Ркуоводство пользователя (16-31)
Elektroniczny aparat do kontrolowania objawów astmy
Instrukcja używania (32-47)
Elektronikus kilégzési csúcsáramlásmérő
Használati útmutató (48-63)
EN
RU
PL
HU
Electronic Asthma Monitor
Instruction Manual
1
Table of Contents
1. Introduction
2. Your Microlife Asthma Monitor
3. Preparation for your first measurement
3.1. Inserting the Batteries
3.2. Setting Date and Time
4. Carrying out a Measurement
5. Important Information for Measurement and Control of your Peak Flow
Values
6. Self-Assessment with the Traffic Light Scheme
7. Cleaning and Disinfecting
7.1. Cleaning / Disinfecting the Mouthpiece
7.2. Cleaning / Disinfecting the Measuring Tube
7.3. Cleaning the Main Unit
8. Memory Handling
9. Printing Data with the Microlife Diagnostic Printer
10. Analysing Data using Computer Interface
11. Messages / Malfunctions / Errors
12. Battery Replacement
13. Care and Safety Information
14. Guarantee
15. Technical Specifications
16. www.microlife.com
EN
2
1. Introduction
Your new Microlife Monitor is a high quality medical device that measures your
maximum possible exhalation which is called «peak flow» (referred to in medical
terms as PEF - Peak Expiratory Flow).
Regular monitoring of your peak flow is extremely useful for controlling diseases
of the airways such as asthma or chronic bronchitis. After the peak flow result
is shown, a further value (for FEV
1
) will then be indicated. This value is also of
interest for your doctor.
The measurements can be performed on your own, because the Microlife Monitor
is very simple to use. It is as suitable for children in the pre-school age as for the
elderly.
Because the device has an automatic memory of 240 data entries, you do not need
to note the values down; simply take the device with you the next time you visit
your doctor. The device can be connected to a computer, and the values can be
analysed by using the Microlife Asthma analyser software program. Alternatively,
the values can be printed out with the small Microlife Diagnostic Printer (optional
accessory).
Read through this instruction manual carefully before using the device and then
keep it in a safe place.
2. Your Microlife Asthma Monitor
The illustration shows the Microlife Asthma Monitor
Memory Scroll
Battery
Compartment
Mouth Piece
On/Off
Display
Data
Compartment
Measuring Tube
3
3. Preparation for your first Measurement
Before your first use we recommend that you disinfect the mouthpiece as explained
in this manual.
3.1. Inserting the Batteries
1. Please open the Battery Compartment from
underneath and insert the two batteries (1.5 V, size
AAA).
2. Please watch the polarity as indicated by the
symbols in the compartment.
3.2. Setting Date and Time
The monitor automatically records the time and
date of each measurement. After new batteries
have been inserted, the time/date display shows
the following setting: year: 2002; day 01, month 01
and time 00:00 o’clock.
You must then re-enter the date and current time.
To do this, proceed as follows (Example: Entering
15th June 2002, 09:50 o’clock):
1. Please open the Data Compartment from
underneath at the position of the data symbol
indication.
2. Press the small time switch next to the clock
symbol with a pen and «2002» starts blinking;
release the switch.
4
3. Using the two arrow keys on the front of
the monitor you can decrease (left arrow button)
or increase (right arrow button) the number.
Release the arrow button when the correct
number is reached.
4. Press the time switch again to confirm the
year setting and move to the month setting.
The month digits blink.
5. The current month can now be entered by
pressing the arrow button. (Example: pressing
5 times the right arrow button advances to 06
for June)
6. Press the time switch again to confirm the
month setting and move to the day setting.
The day digits blink.
7. The current day can now be entered by
pressing the arrow button. (Example: pressing
14 times the right arrow button advances to
15 for 15th June)
8. Press the time switch again to confirm the day
setting and move to the hour setting. The hour
digits blink.
9. The current hour can now be entered by the
arrow button. (Example: pressing 9 times the
right arrow button moves to 09 for 09 o’clock)
10. Press the time switch again to confirm the
hour setting and move to the minute setting.
The minute digits will now blink.
11. The current minutes can now be entered by
pressing the arrow button. (Example: pressing
9 times on the left arrow button moves to 50
for 09:50 o’clock).
5
12. Press the time switch again to confirm all
settings. Date and time are now stored, the
clock starts running and the monitor switches
to «ready» state condition which enable your
first measurement.
13. Close the data compartment.
Please note:
• Ifyouholddownthearrowkeyformorethan2secondsitspeedsup.
• Date/timecanalsobeseteasilyfromcomputerwhenyourun the Microlife
Asthma Analyser Software.
4. Carrying out a Measurement
When different people use this meter their individual readings cannot
be assigned to different users when the data is stored.
If time/date is not set, measurements can not be performed.
If another person intends to use the device permanently, all data from the
previous user should be erased as explained in this manual.
In case another user has already used the monitor, we recommend disinfecting
the measuring tube as explained in this manual. In this case we also
recommend that each user uses a new mouthpiece. Extra mouthpieces can be
ordered through your Microlife dealer.
1. Press the ON/OFF button to turn the monitor
on. At first, the last result of the memory is
shown («0» if there are not yet data) and then
the device indicates «READY» for a measure-
ment by two short beeps and blinking arrows.
2. You can perform the measurement while
standing or sitting upright. For better compa-
rison of your data you should always perform
the measurement in a similar position.
3. Hold the monitor with both hands on the two
rubber areas (compartments).
6
4. Inhale completely and hold your breath for a
moment.
5. Cover the mouthpiece tightly with your lips.
6. Blow into the measuring tube as hard and as
fast as you can.
7. A long beep confirms that the result is
recorded. The peak flow value is displayed
for about 3 seconds, then the FEV
1
is shown.
Afterwards the monitor is ready for a new
measurement which is indicated by two short
beeps.
After the measurement, a small arrow in
the display will indicate if the reading is in
the green, yellow or red range. This device
automatically stores the highest (best)
value to date, with the green range being
any reading above 80% of this best value.
A reading in the yellow range indicates a
reading between 60% and 80% of the best
value. A reading in the red range indicates
a reading below 60% of the best value.
However, these ranges can be set manually
within the software. Please consult your
doctor about the range indication.
8. It is recommended to perform three or more
measurements sequentially.
9. After each measurement, at first the actual
reading is shown in the display and then
it switches automatically to the highest
reading of your current measurement session.
Please note that the monitor only saves
the highest reading from switching the
device on until switching it off.
7
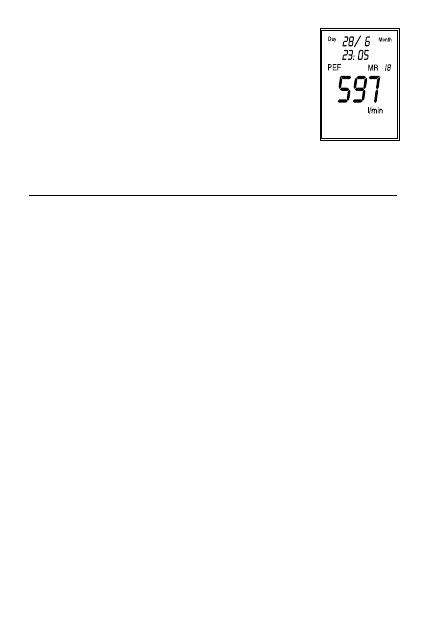
10. Press the ON/OFF button again to switch the
monitor off. Before the monitor switches off,
the highest value and its related memory
position «MR xx» is displayed.
11. Store the monitor in a clean and dust free
place.
5. Important Information for Measurement and Control of your values
It is necessary to keep regular control of your peak flow values. Doctors
generally recommend taking one measurement in the morning and one in the
evening, every day, normally before inhaling your prescribed medication. Carry
out additional measurements whenever you feel unwell or perceive shortness
of breath.
Your doctor is only interested in the highest peak flow value that you can
achieve during a measurement session. Please repeat the measurements until
you feel you have got the best possible result for the moment. Take care to
have sufficient relaxation between measurements. In case of poorer results at
each successive measurement session talk to your doctor. It may be a sign of
instable asthma.
Please note that asthma attacks are indicated in advance by low peak
flow values before you feel it! Please contact your doctor in cases
such as these. Also do so if you have signs and symptoms such as
chest tightness, shortness of breath coughing or wheezing.
Self-measurement means control, not diagnosis or treatment. In any
event, please be sure to discuss your measured values with your
doctor. Your doctor will also explain which values are normal for you.
You should never alter the dosages of any medication without talking to your
doctor.
Please note that the device stores up to 240 measured values with date and
time.
When the memory is full, the oldest values are automatically erased!
Make sure you visit your doctor in time to analyse your data.
Please confirm that date and time settings are always actual.
The performance of the monitor can be affected by extremes of temperature
and humidity. Please refer to «technical specifications» for details.
8
6. Self-Assessment with the Traffic Light Scheme
The so-called «traffic light scheme» allows you to self-assess your measured values
and the course of your illness. This leads to an independent assessment of your
illness symptoms with adjustment of your medication. If you or your physician wish
to make use of this scheme, an asthma control card is enclosed with the device, on
which a green, a yellow, and a red area are marked. The area limits should best be
determined together with your physician and entered into the card.
Significance of the Traffic Light Scheme
Green area - OK
The lung disease is well under control. A higher medication dosage is not required.
Yellow area - Caution
Should your measured values frequently be located in this area, increase your
medication dosage as discussed with your physician.
Red area - Danger
It is dangerous if your measured values are in this area! Act as discussed with your
physician or seek emergency medical treatment.
7. Cleaning and Disinfection
7.1. Cleaning / Disinfecting the Mouthpiece
We recommend disinfecting the mouthpiece
before your first use and at least once a week
using the following procedure:
1. Disconnect the mouthpiece from the
measuring tube and put it for at least 10
minutes into continuously boiling water.
9
2. Afterwards, put the mouthpiece on a fresh
paper towel and let it air dry.
3. Reassemble the mouthpiece on the measuring
tube.
Alternatively, you can disinfect the mouthpiece by putting it into commonly
available disinfecting solutions. Please carefully follow the instructions for the
disinfecting solution! Make sure that it is suitable for a mouthpiece.
7.2. Cleaning / Disinfecting the Measuring Tube
The performance of the monitor can be
affected by spitting or coughing into the
measuring tube. In this case please rinse
the tube with distilled water (available at a
pharmacy or drugstore). Please do not use
tapwater.
1. Disconnect the measuring tube from the main
unit by moving it in a forward direction.
2. Disconnect the mouthpiece from the
measuring tube.
3. Rinse the tube in distilled water, afterwards
please shake off the water and put it on a
fresh paper towel for complete drying.
• Incaseanotheruserhasalreadyusedthe
monitor the measuring tube should be
disinfected:
1. Disconnect the tube as explained above and
put it into a commonly available disinfecting
solution. Please carefully follow the
instructions for the disinfecting solution!
2. Never put the measuring tube into boiling
water!
100 C/212 F
3. Reconnect the mouthpiece to the measuring
tube and reassemble it back to the main unit as
shown. Make sure that the tube finally
«clicks» into the fixed position.
4. Please make sure that the mea-
surement tube and the device stay
together by confirming that the
identification on tube and device is
the same.
7.3. Cleaning the Main Unit
Clean the main unit once a day with a clean,
damp cloth. Never put the main unit into
water!
8. Memory Handling
The 240 measuring data can be reviewed on the display:
1. Switch the monitor on and press the memory
scroll buttons.
2. By pressing the «<» button, you can see the
latest value stored in the memory with date
and time; pressing this button once at a time
shows all stored data. If you keep pressing
the button you can move quickly through the
memory.
3. The «>» button works in the opposite
direction.
Memory Capacity Low
When the memory covers 230 or more
data, «MR XX» is blinks after the monitor is
switched on to indicate that the remaining
memory capacity is low.
10
11
Memory Full
When the memory is full with 240 data,
the monitor gives a warning «beep»
when switching on and «MR 240»
is blinks. From now on, data is still
memorised but the oldest values are
automatically erased!
Memory Clear
please note: the memory is automatically cleared after data transfer to
computer.
Clearing all data from the memory manually should be done when you intend
to give the monitor to another person. To clear all data press the «<» and the
«>» buttons simultaneously for 5 seconds, and then release the buttons. «clr»
starts blinking in the display for about 3 seconds. If you really want to erase all
data from memory you need to press the ON/OFF button during these seconds.
Otherwise the monitor moves back to normal operation and the data remains.
• Clear the last measurement
You can erase the last memory reading by pressing both memory scroll buttons
simultaneously for 5 seconds. After releasing the buttons «clr» will flash on
the screen for 3 seconds. To erase the last reading you need to press both
buttons again while the screen is flashing.
9. Print Data with the Microlife Diagnostic Printer
The monitor can be connected with the
Microlife diagnostic printer (available as an
accessory) to print data from the memory.
1. Open the Data Compartment from the
underneath.
2. Connect one end of the printer cable into the
jack next to the printer symbol and the other
end with the printer next to «Input». It does
not matter which end of the cable you insert
into which device.
PC
3. Insert paper into the printer by following the
instructions supplied with the printer.
4. Switch the printer on by moving the start
button to the «I» position.
5. Press the ON/OFF button to turn the Asthma
monitor on.
6. Print a Single Result
Select the memory value that you wish to print using by the «<»or «>» buttons.
Press the small switch next to the printer symbol on the data compartment.
«Pr 1» is displayed and the printer starts printing.
Print all Memory Data
Please follow the above instructions but press on the small switch next to the
printer symbol for about 3 seconds. «Pr» is displayed and the printer starts
printing all data.
10. Analyse Data by Computer
The monitor can be connected via a USB connection port with a computer and all
memory data can be analysed by the MICROLIFE Asthma Monitor software program.
Please contact your Microlife dealer.
11. Messages / Malfunctions / Errors
If an error occurs one of the following listed error codes is displayed.
12
Message Cause Remedy
Er2
Data communication between
device and printer does not
work.
Please check the cable
connection between device
and printer.
no
There is no data stored in the
Monitor.
Hi
The result is higher than 900
ml/min.
This is a very good result.
13
Other possible malfunctions
If problems occur when using the device, the following points should be checked:
If you have any questions regarding the use of this device, please ask your dealer
or pharmacist for the Microlife Service representative in your country. The Microlife
service team will be happy to help you.
12. Battery Replacement
When the battery low symbol appears in the display, the device is blocked until the
batteries have been replaced
Please use 1.5 V «Long-Life» or «Alkaline» batteries, size «AAA». The use of 1.2 V
Accumulator batteries is NOT recommended. If the monitor is left unused for longer
periods, please remove the batteries.
Please note that during battery exchange the data stored in the memory of the
monitor is well protected and will NOT be lost.
After battery change (or when the unit has been disconnected from any
power supply) time/date needs to be entered, again! Otherwise data can
not be memorised.
Malfunction Remedy
The display remains empty. 1. Check the polarity of the batteries (+/-)
Batteries have been installed. 2. If the display is erratic orunusual, remove
the batteries and re-install new batteries.
The instrument frequently fails to
measure or the values measured
are wrong.
1. Ensure that the measuring tube is
connected correctly.
2. Check if when blowing into the tube,
the wing wheel is rotating. Any objects,
dust liquids or mucous may interfere the
rotation of the wing wheel. In this case
clean the tube as explained.
3. Discuss the values with your doctor.
13. Care and Safety Information
Do not expose the device to extreme
temperatures, humidity, dust or direct
sunlight.
Clean the device with a soft, dry cloth. Do not
use gasoline, thinners or similar solvents. The
measuring tube should not be washed in a
dishwasher!
Do not drop the instrument or treat it roughly
in any way. Avoid strong vibrations.
Never attempt to repair the instrument
yourself. Any unauthorised opening of the instrument
invalidates all guarantee claims!
• Ifthedevicereceivedanyknocks(dropping),
you will recognise any malfunction or
damages or you receive surprising results, it
should be checked by the Microlife service
representative in your country.
14. Guarantee
This device is guaranteed for 2 years from date of purchase. This guarantee
includes the main unit and the measuring tube. The guarantee does not apply to
damage caused by improper handling, damage from leaking batteries, accidents,
not following the operating instructions or alterations made to the instrument by
third parties. The guarantee is only valid upon presentation of the purchase receipt
or guarantee card filled out by the dealer.
Name and company address of the responsible dealer:
14
Gasoline
15
15. Technical Specifications
Technical modifications reserved!
16. www.microlife.com
Detailed user information about our products and services can be found at
www.microlife.com
Measuring range:
PEF from 50 to 900 l/min
FEV
1
from 0.01 to 9.99 litres
Measuring method:
Rotating wing wheel
Accuracy:
PEF ± 20 l/min or 10% of the reading, whichever is
greater.
FEV
1
± 0.1 l or ± 5% of the reading, whichever is greater.
Measuring resolution:
PEF 1 l/min; FEV
1
0.01 l
Data safety:
data rememorised by EEPROM
Memory:
240 measurements with date/time
Size:
77 (W) x 144 (L) x 48 (H) mm
Weight:
150g (with batteries)
Storage temperature:
-5 to +50 °C or 23 to 122 °F,
10 to 90% relative humidity max.
Operation temperature:
10 to 40 °C or 50 to 104 °F,
10 to 85% relative humidity max.
Power source:
2 batteries of 1.5 V, size AAA
Reference to standards:
CE (EU Guidelines 93/42/EWG) EN60601-1
ATS standard 1994 update
System requirements:
Microsoft
®
Windows
®
2000/Windows
®
XP, 550 MHz CPU,
500 MB free hard disk, 256 MB RAM, 800 x 600 pixel
re solution, 256 colour, CD-ROM drive, one free USB port
Электронный прибор для контроля астмы
Ркуоводство пользователя
16
17
Содержание
1. Введение
2. Ваш прибор для контроля астмы Microlife
3. Подготовка к первому измерению
3.1. Установка батареек
3.2. Установка даты и времени
4. Проведение измерений
5. Важная информация по измерению и контролю Ваших показаний максимальной
скорости выдоха
6. Самостоятельная оценка результатов по системе «светофор»
7. Чистка и дезинфекция
7.1. Чистка и дезинфекция горловины
7.2. Чистка и дезинфекция измерительной трубки
7.3. Чистка корпуса прибора
8. Операции с памятью
9. Распечатка данных с помощью диагностического принтера Microlife
10. Анализ данных с помощью интерфейса с компьютером
11. Сообщения / Неисправности / Ошибки
12. Замена батареек
13. Информация по уходу и безопасности
14. Гарантия
15. Технические характеристики
16. www.microlife.ru
RU
  • Page 1 1
  • Page 2 2
  • Page 3 3
  • Page 4 4
  • Page 5 5
  • Page 6 6
  • Page 7 7
  • Page 8 8
  • Page 9 9
  • Page 10 10
  • Page 11 11
  • Page 12 12
  • Page 13 13
  • Page 14 14
  • Page 15 15
  • Page 16 16
  • Page 17 17
  • Page 18 18
  • Page 19 19
  • Page 20 20
  • Page 21 21
  • Page 22 22
  • Page 23 23
  • Page 24 24
  • Page 25 25
  • Page 26 26
  • Page 27 27
  • Page 28 28
  • Page 29 29
  • Page 30 30
  • Page 31 31
  • Page 32 32
  • Page 33 33
  • Page 34 34
  • Page 35 35
  • Page 36 36
  • Page 37 37
  • Page 38 38
  • Page 39 39
  • Page 40 40
  • Page 41 41
  • Page 42 42
  • Page 43 43
  • Page 44 44
  • Page 45 45
  • Page 46 46
  • Page 47 47
  • Page 48 48
  • Page 49 49
  • Page 50 50
  • Page 51 51
  • Page 52 52
  • Page 53 53
  • Page 54 54
  • Page 55 55
  • Page 56 56
  • Page 57 57
  • Page 58 58
  • Page 59 59
  • Page 60 60
  • Page 61 61
  • Page 62 62
  • Page 63 63
  • Page 64 64
  • Page 65 65
  • Page 66 66

Microlife PF 100 Инструкция по применению

Категория
Измерительное, тестовое и контрольное оборудование
Тип
Инструкция по применению

Задайте вопрос, и я найду ответ в документе

Поиск информации в документе стал проще с помощью ИИ

на других языках