Hisense HS212F Руководство пользователя

Тип
Руководство пользователя
Before using the sound bar, please read this manual
thoroughly and retain it for future reference.
Model: HS212F
2.1 CH SoundBar with Wireless Subwoofer
EN RUS
2
Contents
Important Safety Instructions 3
Safety ...........................................................................................................................................................................................3
Warning.......................................................................................................................................................................................4
What’s in the Box 5
Identifying the Parts 6
Main Unit ...................................................................................................................................................................................6
Wireless Subwoofer ................................................................................................................................................................6
Remote Control........................................................................................................................................................................7
Instructions 7
Prepare the Remote Control................................................................................................................................................7
Replace the Remote Control Battery................................................................................................................................7
Placement and Mounting.....................................................................................................................................................8
Wall Mounting (if using option-B).....................................................................................................................................8
Connections 9
Connect to OPTICAL Socket ...............................................................................................................................................9
Connect to AUX Socket .......................................................................................................................................................9
Connect to HDMI (ARC) Socket .........................................................................................................................................9
Connect to COAXIAL Socket ............................................................................................................................................ 10
Connect Power...................................................................................................................................................................... 10
Pair up with the subwoofer............................................................................................................................................... 10
Basic Operation 11
Standby/On
Auto Wake
How to Enable Auto Wake
............................................................................................................................................................................
..............................................................................................................................................................................
................................................................................................................................................
.......................................................................................................................................
11
11
11
11
Select Modes..........................................................................................................................................................................11
Adjust the Bass/Treble Level............................................................................................................................................. 11
Turn the Surround Sound ON/OFF................................................................................................................................. 11
Adjust the Volume................................................................................................................................................................ 11
Adjust the Brightness.......................................................................................................................................................... 11
............................................................................................................................................. 11
OPTICAL / COAXIAL / HDMI ARC / AUX Operation 12
Bluetooth Operation 12
Pair Bluetooth-enabled Devices...................................................................................................................................... 12
Listen to Music from Bluetooth Device........................................................................................................................ 12
USB Operation 13
Troubleshooting 13
14
EN
3
10 Protect the power cord from being walked on
or pinched particularly at plugs, convenience
receptacles, and the point where they exit
from the apparatus.
11
the manufacturer.
12 Use only with the cart, stand, tripod,
bracket or table speci ed by the
manufacturer, or sold with the
unit. When a cart or rack is
used, use caution when moving the cart/
unit combination to avoid injury from
tip-over.
13 Unplug the unit during lightning storms
or when unused for long periods of time.
14 Refer all servicing to personnel.
Servicing is required when the unit has
been damaged in any way, such as power
supply cord or plug is damaged, liquid has
been spilled or objects have fallen into the
unit, the unit has been exposed to rain
or moisture, does not operate normally, or has
been dropped.
15 This equipment is a Class II or double
insulated electrical appliance. It has been
designed in such a way that it does not require
a safety connection to electrical earth.
16
on the unit.
17 Minimum distance around the unit for
18 The ventilation should not be impeded by
covering the ventilation openings with items,
such as newspapers, table-cloths, curtains, etc.
19 No naked sources, such as lighted
candles, should be placed on the unit.
20 Batteries should be recycled or disposed of as
per state and local guidelines.
21 The unit can be used in moderate or tropical
climates.
Important Safety Instructions
The lightning ash with arrowhead
symbol, within an equilateral triangle, is
intended to alert the user to the presence
of uninsulated dangerous voltage” within
the product’s enclosure that may be of
su cient magnitude as to constitute a
risk of electric shock to persons.
Safety
1Read these instructions All the safety and
operating instructions should be read before
this unit is operated.
2Keep these instructions The safety and
operating instructions should be retained for
future reference.
3Heed all warnings All warnings on the
appliance and in the operating instructions
should be adhered to.
4Follow all instructions All operating and
usage instructions should be followed.
5Do not use this unit near water The
appliance should not be used near water or
moisture for example, in a wet basement or
near a swimming pool or similar location.
6Clean only with a dry cloth.
7Do not block any ventilation openings.
Install in accordance with the manufacturers
instructions.
8 Do not install near any heat sources such as
radiators, heaters, stoves, or other apparatus
9 The unit is supplied with a standard mains lead
and moulded plug which for safety reason must
into your wall socket, consult an electrician for
replacement of the obsolete mains socket.
CAUTIO N
RISK OF ELECTRIC SHOCK
DO NOT OPEN
AVIS
RISQUE DE CHOC
ÉLECTRIQUE NE PAS PUVRIR
The exclamation point within an
equilateral triangle is intended to alert the
user to the presence of important operating
and maintenance (servicing) instructions in
the literature accompanying the appliance.
EN
4
Caution:
Battery usage CAUTION
To prevent battery leakage which may result in
bodily injury, property damage, or damage to the
apparatus:
- Install all batteries correctly, + and - as marked
on the apparatus.
-
not expose this unit to rain or moisture.
The unit must not be exposed to
dripping or splashing and objects with
liquids, such as vases, must not be placed on
unit.
- The mains plug/appliance coupler is used as
the disconnect device, the disconnect device
must remain readily operable.
- Danger of explosion if battery is incorrectly
replaced. Replace only with the same or
equivalent type.
Warning
The battery (batteries or battery pack) shall not
be exposed to excessive hea
direct heat sources.
Before operating this unit, check the
voltage of this unit to see if it is identical to
the voltage of your local power supply.
Do not place this unit close to strong magnetic
Do not place this unit on the or
receiver.
If any solid object or liquid falls into the
system, unplug the system and have it checked
further.
Do not attempt to clean the unit with chemical
clean, dry or slightly damp cloth.
When removing the power plug from the wall
outlet, always pull directly on the plug, never
yank on the cord.
Changes or ations to this unit not
expressly approved by the party responsible
for compliance will void the users authority to
operate the equipment.
The rating label is pasted on the bottom or
back of the equipment.
- Do not mix old and new batteries.
- Do not mix alkaline, standard (Carbon-Zinc) or
rechargeable (Ni-Cd, Ni- MH, etc.) batteries.
- Remove batteries when the unit is not used for
a long time.
Correct Disposal of this product. This
marking indicates that this product
should not be disposed with other
household wastes throughout the EU.
To prevent possible harm to the environment or
human health from uncontrolled waste disposal,
recycle it responsibly to promote the sustainable
reuse of material resources. To return your used
device, please use the return and collection
systems or contact the retailer where the product
was purchased. They can take this product for
environmental safe recycling.
Hereby, Hisense International
Co., Ltd declares that the 2.1 channel
soundbar with wireless subwoofer is
in compliance with the essential requirements and
other relevant provisions of Directive 2014/53/EU
The Bluetooth word mark and logos are registered
trademarks owned by Bluetooth SIG,. Inc.
HDMI is a trademark or registered trademark of
HDMI Licensing, LLC in the United States and/or
other countries.
Manufactured under license fro m Dolby
Laboratories. Dolby, Dolby Audio, and the
double-D symbol are trademarks of Dolby
Laboratories Licensing Corporation.
EN
5
What’s in the Box
AC Power Cord
x 2
Main Unit Remote Control /
AAA Batteries x 2
Wireless Subwoofer
Optical Cable HDMI Cable
User Manual/Quick Start GuideWall Mounting Kit
EN
6
1 2 3
Identifying the Parts
Main Unit
2 Remote Control Sensor
Receive signal from the remote control.
1 Display Window
Show the current status.
6Wall Mount
Install the wall mounting screws into the
wall mount of the unit.
3 (ON/OFF) Button
Switch the unit between ON and STANDBY mode.
5 +/- (Vol+/Vol-) Buttons
Increase/decrease the volume level.
4(SOURCE) Button
Select the play mode.
7 AC IN Socket
Connect to the power supply.
8 USB Socket
Insert the USB device to play music.
10 AUX Socket
Connect to an external audio device.
11 HDMI ARC Socket
Connect to a TV via HDMI cable.
12 COAXIAL Socket
Connect to a coaxial audio output on the TV.
9 OPTICAL Socket
Connect to an optical audio output on the TV.
Wireless Subwoofer
3 AC IN Socket
Connect to power supply.
2 Reset Button
Press the button on the subwoofer, blue
LED light will be o and the subwoofer will
broadcast the software version. The pairing
record will be cleared.
1 PAIR Indicator
Light up solidly when the pairing succeed.
12
11
10
6
3
1 2
54
8
97
AC IN
EN
7
Remote Control
1Switch the unit between ON and
STANDBY mode.
12 (MUTE) Mute or resume the volume.
2(SOURCE) Select the play mode.
4(BT) Select the Bluetooth mode.
3 SURR Adjust the surround ON/OFF.
5 EQ Select MUSIC/MOVIE/NEWS/SPORT/NIGHT
11 DIMMER+/- Adjust display brightness.
9BASS+/- Increase/decrease the bass level.
10 TREBLE+/- Increase/decrease the treble level.
Instructions
Prepare the Remote Control
The provided Remote Control allows the unit to
be operated from a distance.
Even if the Remote Control is operated within
the e ective range 19.7 feet (6m), remote
control operation may be disrupted if there
are any obstacles between the unit and the
remote control.
If the Remote Control is operated near other
products which generate infrared rays, or if
other remote control devices using infra-red
rays are used near the unit, it may operate
incorrectly. Conversely, the other products may
operate incorrectly.
Replace the Remote Control Battery
Precautions Concerning Batteries
Be sure to insert the batteries with correct
positive and negative polarities.
Use batteries of the same type. Never use
Either rechargeable or non-rechargeable
batteries can be used. Refer to the precautions
on their labels.
Be aware of your ngernails when removing
the battery cover and the battery.
Do not drop the remote control.
Do not allow anything to impact the remote
control.
Do not spill water or any liquid on the remote
control.
Do not place the remote control on a wet
object.
Do not place the remote control under direct
sunlight or near sources of excessive heat.
Remove the battery from the remote control
when not in use for a long period of time,
as corrosion or battery leakage may occur
and result in physical injury, and/or property
Do not use any batteries other than those
Do not mix new batteries with old ones.
to be a rechargeable type.
1 Press and slide the back
cover to open the battery
compartment of the
remote control.
2 Insert two AAA size
batteries (included). Make
sure the (+) and () ends of
the batteries match the (+)
and (–) ends indicated in
the battery compartment.
3 Close the battery
compartment cover.
7 VOL+/VOL- Increase/decrease the volume level.
6 / Skip to previous/next track in BT/USB mode.
8Play/pause/resume playback in BT/USB mode.
Press and hold to activate the pairing
function in Bluetooth mode or disconnect the
existing paired Bluetooth device.
EN
8
Placement and Mounting
Placement
A If your TV is placed on a table, you can place the
unit on the table directly in front of the TV stand,
centered with the TV screen.
B If your TV is attached to a wall, you can mount
the unit on the wall directly below the TV screen.
Wall Mounting (if using option-B)
Note:
-
personal injury and property damage (if you intend to install this product yourself, you must check
for installations such as electrical wiring and plumbing that may be buried inside the wall). It is the
installer’s responsibility to verify that the wall will safely support the total load of the unit and wall
brackets.
- Additional tools (not included) are required for the installation.
- Do not overtighten screws.
- Keep this instruction manual for future reference.
-
A B
EN
9
Connections
Connect to HDMI (ARC) Socket
Your Soundbar supports HDMI with Audio Return
Channel (ARC). If your TV is HDMI ARC compliant,
you can hear the TV audio through your Soundbar
by using a single HDMI cable.
1 Using a High Speed HDMI cable, connect the
HDMI OUT (ARC)-TO TV connector on your
Soundbar to the HDMI ARC connector on
the TV.
- The HDMI ARC connector on the TV might be
manual.
2 On your TV, turn on HDMI-CEC operations. For
details, see the TV user manual.
Tips:
- Your TV must support the HDMI-CEC and ARC
function. HDMI-CEC and ARC must be set to
On.
- The setting method of HDMI-CEC and ARC may
di er depending on the TV. For details about
ARC function, please refer to your TV owner’s
manual.
- Only HDMI 1.4 compatible cables can support
the ARC function.
Connect to OPTICAL Socket
-Remove the protective cap of the OPTICAL
socket, then connect an OPTICAL cable
to the TV’s OPTICAL OUT socket and the
OPTICAL socket on the unit.
Connect to AUX Socket
A Use a RCA to 3.5mm audio cable to connect
the TV’s audio output sockets to the AUX
socket on the unit.
B Use a 3.5mm to 3.5mm audio cable to connect
the TV’s or external audio device AUX socket
to the AUX socket on the unit. BA
AUX
EN
Connect to COAXIAL Socket
You can use the COAXIAL cable to connect
the TV's COAXIAL OUT socket and COAXIAL
socket on the unit.
Tip: The unit may not be able to decode all digital
audio formats from the input source. In this case,
the unit will mute. This is NOT a defect. Ensure
that the audio setting of the input source (e.g. TV,
game console, DVD player, etc.) is set to PCM or
Dolby Digital (Refer to the user manual of the
input source device for its audio setting details)
with HDMI / OPTICAl / COAXIAL input.
10
Connect Power
Risk of product damage!
- Ensure that the power supply voltage
corresponds to the voltage printed on the
back or the underside of the unit.
- Before connecting the AC power cord,
ensure you have completed all other
connections.
Subwoofer
Connect the mains cable to the AC IN Socket
of the subwoofer and then into a mains
socket.
Soundbar
Connect the mains cable to the AC IN Socket
of main unit and then into a mains socket.
Pair up with the subwoofer
Automatic pairing
Plug the soundbar and the subwoofer into the
mains sockets and then press on the unit or
remote control to switch the unit to ON mode.
The subwoofer and soundbar will automatically
pair.
When the subwoofer is pairing with the
When the subwoofer is paired with the main
unit, the Pair Indicator will light up.
NOTE:
-Do not press the button on the subwoofer
except for manual pairing.
- If the automatic pairing fails, pair the
subwoofer with the main unit manually.
Manual pairing
If no audio from the wireless subwoofer can be
heard, manually pair up the subwoofer.
1 Unplug both units from the mains sockets
again, then plug them in again after 3 minutes.
Press and hold the button on the
-
soundbar or on the remote control for 3 seconds.
- Then press on the unit or remote control to
switch the unit ON.
EN
- The Pair indicator on the subwoofer will rapidly
blink.
11
2 The Pair indicator on the subwoofer will
become solid when successful.
3 If the Pair indicator still keeps blinking, repeat
step 1-2.
NOTE:
The subwoofer should be within 6 m of the
soundbar in an open area (the closer the
better).
Remove any objects between the subwoofer
and the soundbar.
If the wireless connection fails again, check
if there is a objects or strong interference
(e. g. interference from an electronic device)
around the location. Remove these objects
or strong interferences and repeat the above
procedures.
If the main unit is not connected with the
subwoofer and it is in ON mode, the unit’s
Basic Operation
Standby/On
socket, the main unit will be in STANDBY mode.
• Press the button on the unit or on the
remote control to switch the unit ON.
Press the button again to switch the unit
back to STANDBY mode.
Disconnect the mains plug from the mains
socket if you want to switch the unit OFF
completely.
Auto Wake
If a TV or an external device is connected (AUX
/ OPTICAL / COAXIAL / HDMI ARC), the unit
will switch on automatically when the TV or
the external device is switched on.
How to Enable Auto Wake
Short press the (SOURCE) button and
+ (VOL +) button on the unit to enable or
disable Auto Wake function.
Auto Wake On: white and green LED blink twice
sequentially. While in STANDBY mode, the
RED LED is breathing.
sequentially. While in STANDBY mode, the LED
is in solid red.
The unit automatically turns to STANDBY mode
after about 15 minutes if the TV or the external
mains plug from the mains socket.
Please turn the unit completely to save
energy when not in use.
Select Modes
Press the (SOURCE) button repeatedly on
the unit or on the remote control to select the
OPTICAL, COAXIAL, HDMI ARC, BT(Bluetooth),
USB, AUX mode.
The selected mode will show on the display.
Adjust the Bass/Treble Level
Press TREBLE +/- button to increase or
decrease the treble. (treble+5 / treble–5)
Press BASS+/- button to increase or decrease
the bass. (bass+5 / bass–5)
After about 3 seconds, the unit will exit from
bass/treble setting. The display will show the
current selected mode. You may now press the
VOL+ / - buttons to adjust volume.
Turn the Surround Sound ON/OFF
Press the SURR button on the remote control
to turn on the surround sound. Press this
Adjust the Volume
- Press the + / - buttons on the unit or VOL+/VOL-
on the remote control to adjust the volume.
-
(MUTE) button on the remote control. Press
the (MUTE) button again or press the VOL+ /
VOL- buttons to resume normal listening.
Adjust the Brightness
-Press the DIMMER +/- buttons on the remote
control to select brightness level.
While playing, press the EQ button on the
remote control to select desired preset
equalizers: MUSIC, MOVIE, NEWS, SPORT,
NIGHT.
In Aux o mode, press - - - in
sequence to turn on Auto Standy mode.
In Aux on mode, press - - - in
sequence to turn o Auto Standy mode.
EN
/
12
OPTICAL/COAXIAL/HDMI
ARC/AUX Operation
1Ensure that the unit is connected to the TV or
audio device.
2 Press the button repeatedly on the unit or
on the remote control to select the OPTICAL,
COAXIAL, HDMI ARC, BT, USB, AUX mode.
3 Operate your audio device directly for playback
features.
4 Press the VOL +/– button to adjust the volume
to your desired level.
Tip:
The unit may not be able to decode all digital
audio formats from the input source. In this
case, the unit will mute. This is NOT a defect.
Ensure that the audio setting of the input
source (e.g. TV, game console, DVD player,
etc.) is set to PCM or Dolby Digital (Refer to
the user manual of the input source device
for its audio setting details) with HDMI ARC /
OPTICAl / COAXIAL input.
Bluetooth Operation
Pair Bluetooth-enabled Devices
player, you need to pair your device to this player.
Note:
- The operational range between this player
and a Bluetooth device is approximately 26
feet (8m) (without any object between the
Bluetooth device and the unit).
- Before you connect a Bluetooth device to this
unit, ensure you know the devices capabilities.
- Compatibility with all Bluetooth devices is not
guaranteed.
- Any obstacle between this unit and a Bluetooth
device can reduce the operational range.
- If the signal strength is weak, your Bluetooth
receiver may disconnect, but it will re-enter
pairing mode automatically.
1 During ON mo de, pre ss the bu tton
repeatedly on the unit or the (BT) button on
the remote control to select Bluetooth mode.
NO BT will show on the display if the unit is
not paired to any Bluetooth device.
2 Activate your Bluetooth device and select the
search mode. “Hisense HS212F will appear on
your Bluetooth device list.
- press and hold the
button on the remote control to be
searchable. The display will showPAIR and
you will hear "Pairing" from the unit.
3 Select Hisense HS212F in the pairing list. After
successful pairing, you will hear "Paired" from
the unit, and the display panel shows BT.
4 Play music from the connected Bluetooth device.
To disconnect the Bluetooth function, you can :
- Switch to another function on the unit.
- Disable the function from your Bluetooth device.
The Bluetooth device will be disconnected from the
unit after the Disconnected voice prompt.
- Press and hold the button on the
remote control.
Tips:
Enter "0000" for the password if necessary.
If no other Bluetooth device pairs with this
player within two minutes, the player will
recover its previous connection.
The player will also be disconnected when your
device is moved beyond the operational range.
If you want to reconnect your device to this
player, place it within the operational range.
If the device is moved beyond the operational
range, when it is brought back, please check if
the device is still connected to the player.
If the connection is lost, follow the instructions
above to pair your device to the player again.
Listen to Music from Bluetooth Device
- If the connected Bluetooth device supports
Advanced Audio Distribution Pro le (A2DP),
you can listen to the music stored on the
device through the player.
- If the device also supports Audio Video Remote
Control Pro le (AVRCP), you can use the
player's remote control to play music stored on
the device.
1 Pair your device with the player.
2 Play music via your device (if it supports A2DP).
3 Use supplied remote control to control play (if
it supports AVRCP).
- To pause/resume play, press the
button on the remote control.
- To skip to a track, press the
buttons on the remote control.
EN
/
13
USB Operation
1 Insert the USB device.
2 Press the button repeatedly on the unit
or on the remote control to select USB mode.
3 During playback:
- To pause or resume play, press the
button on the remote control.
- To skip to the previous/next e, press the
buttons on the remote control.
Tips:
The unit can support USB devices with up to
32 GB of memory.
This unit can play MP3/WAV/WMA.
The unit support FAT32.
Troubleshooting
To keep the warranty valid, never try to repair the
system yourself. If you encounter problems when
using this unit, check the following points before
requesting service.
No power
Ensure that the AC cord of the unit is
properly connected .
Ensure that there is power at the AC outlet.
Press STANDBY button to turn the unit on.
Remote control does not work
Before you press any playback control button,
Reduce the distance between the remote
control and the unit.
Insert the battery with its polarities (+/-)
aligned as indicated.
Replace the battery.
Aim the remote control directly at the sensor
on the front of the unit.
No sound
- Increase the volume. Press VOL + on the
remote control or on the soundbar.
- Press (MUTE) on the remote control to ensure
the soundbar is not muted.
-
source.
- When using either of the Digital inputs, if there
is no audio:
- Try setting the TV output to PCM or
- Connect directly to your Blu-ray/other source,
some TVs do not pass through digital audio.
- Your TV may be set to variable audio output.
FIXED or STANDARD, not VARIABLE. Consult
your TV’s user manual for more detailed
information.
- If using Bluetooth, ensure that the volume on
your source device is turned up and that the
device is not muted.
I cant nd the Bluetooth name of
this unit on my Bluetooth device for
Bluetooth pairing
Ensure the Bluetooth function is activated on
your Bluetooth device.
• Ensure you have paired the unit with your
Bluetooth device.
This is a 15 mins power function,
one of the ERPII standard requirement
for saving power
• When the unit's external input signal level is too
15 minutes. Please increase the volume level of
your external device.
The subwoofer is idle or the indicator
of subwoofer do not light up.
• Please unplug power cord from the mains
sockect, and plug it in again after 4 minutes to
resent the subwoofer.
• Embedded USB full speed host for USB
applications should not exceed 6.5Mbps.
can not exceed 4608 byte, otherwise it would
lead to staccato sound or no sound.
EN
14
Model Name HS212F
Soundbar
Power Supply AC100-240V~50/60Hz
Power Consumption 15W
Standby Power ≤ 0.5 W
USB port for playback
USB Compatibility
5V 0.5A
Hi-Speed USB (2.0) / FAT32
32G (max) , MP3/WAV/WMA
Dimension (WxDxH) 38 x 2.17 x 3.35 inches (960 x 55 x 85.08mm )
Net weight 3.79 lbs (1.72kg)
Audio input sensitivity 500mV
Frequency Response 120Hz - 20KHz
Bluetooth Version V 5.0
Bluetooth Maximum power transmitted 3dBm
Frequency bands 2402-2480MHz
Subwoofer
Power Supply AC100-240V~50/60Hz
Power Consumption 15 W
Standby Power ≤ 0.5 W
Dimension (WxHxD) 8.27 x 13.3 x 9.76inches (210 x 338 x248mm)
Net weight 10.47 lbs (4.75kg)
Frequency Response 40Hz -120Hz
Sound bar 60W, 30W x 2, Test Mode@THD=10%
Subwoofer 60W, Test Mode@THD=10%
Total 120W
Remote Control
Distance/Angle 6m / 30°
Battery type AAA (1.5V X 2)
EN
2.1 CH Звуковая панель с беспроводным сабвуфером
Модель
: HS212F
РУКОВОДСТВО ПОЛЬЗОВАТЕЛЯ
Перед использованием звуковой панели внимательно прочитайте
данное руководство и сохраните его на случай необходимости.
RUS
2
Содержание
Важные инструкции по технике 3
Меры предосторожности .................................................................................................................................................. 3
Внимание ................................................................................................................................................................................... 4
Что в упаковке 5
Указатель деталей 6
Основное устройство ..........................................................................................................................................................6
Беспроводной сабвуфер ....................................................................................................................................................6
Пульт управления ..................................................................................................................................................................7
Инструкции 7
Подготовка пульта управления .......................................................................................................................................7
Замена аккумулятора пульта дистанционного управления ..............................................................................7
Размещение и установка .................................................................................................................................................... 8
Крепление на стене (вариант B)......................................................................................................................................8
Подключение 9
Подключение к разъему OPTICAL ..................................................................................................................................9
Подключиться к разъему AUX .........................................................................................................................................9
Подключение к разъему HDMI (ARC) ............................................................................................................................ 9
Подключение к разъему COAXIAL .............................................................................................................................. 10
Подключение питания ..................................................................................................................................................... 10
Сопряжение с сабвуфером ............................................................................................................................................ 10
Базовые операции 11
Режим ожидания/Включение........................................................................................................................................ 11
Автоактивация ..................................................................................................................................................................... 11
Как включить автопробуждение ................................................................................................................................. 11
Автоматическое выключение ....................................................................................................................................... 11
Выбор режимов ................................................................................................................................................................... 11
Регулировка уровня низких/высоких частот ........................................................................................................11
Включение/выключение объемного звука ............................................................................................................ 11
Изменение громкости ...................................................................................................................................................... 11
Регулировка яркости ........................................................................................................................................................ 11
Выбор предварительно установленных звуковых эффектов ........................................................................ 11
Использование разъемов OPTICAL / COAXIAL / HDMI ARC / AUX 12
Использование Bluetooth 12
Сопряжение устройств с поддержкой Bluetooth ................................................................................................12
Оспроизведение музыки с устройства Bluetooth................................................................................................ 12
Использование USB-устройства 13
Устранение неполадок 13
Спецификации 14
RU
3
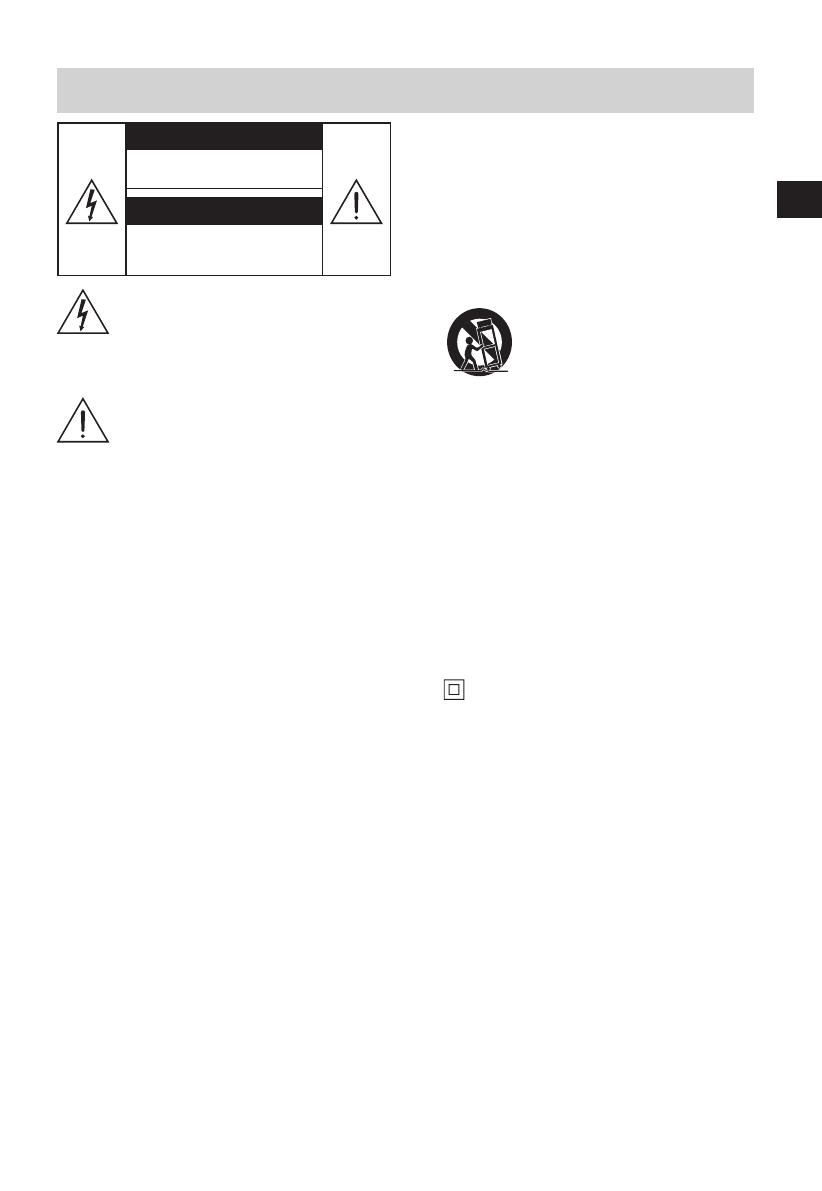
Символ молнии со стрелкой в
равностороннем треугольнике
оповещает пользователя о наличии
неизолированного «опасного
напряжения» в продукте, которое может
привести к удару электрическим током.
Восклицательный знак в
равностороннем треугольнике
предупреждает пользователя о наличии
важных инструкций по использованию
и обслуживанию в литературе,
поставляемой с устройством.
Меры предосторожности
1 Прочитайте данные инструкции
Перед использованием этого устройства
необходимо внимательно прочитать
инструкции по технике безопасности и
эксплуатации.
2 Сохраните данные инструкции
Инструкции по технике безопасности и
эксплуатации необходимо сохранить для
последующего использования.
3 Обращайте внимание на все
предупреждения – Необходимо соблюдать
все предупреждения на устройстве и в
инструкциях по эксплуатации.
4 Следуйте всем инструкциям – Необходимо
соблюдать все инструкции по эксплуатации.
5 Не используйте данное устройство
рядом с водой – Устройство не следует
использовать рядом с водой или влагой,
например, во влажном подвале или рядом с
бассейном и озером.
6 Очищать только сухой тканью.
7 Не блокируйте вентиляционные
отверстия. Установите устройство в
соответствии с инструкциями производителя.
8 Не устанавливайте устройство рядом с
источниками тепла, такими как обогреватели,
радиаторы, плиты, и другими устройствами
(в том числе усилителями), которые могут
нагреваться.
9 Устройство поставляется со стандартным
сетевым кабелем и литой вилкой, которые
по соображениям безопасности не должны
модифицироваться. Если вилка не подходит
к настенной розетке, обратитесь к электрику
для замены старой настенной розетки.
10 Не наступайте на шнур питания и не
допускайте его повреждения, особенно
возле штекера и в месте выхода шнура из
устройства.
11 Используйте только крепления и аксессуары,
указанные производителем.
12 Используйте устройство только с
тележкой, подставкой, штативом,
кронштейном или столом,
указанным производителем или
предоставленным с телевизором.
При использовании тележки или стойки
следует быть осторожным при перемещении
тележки с устройством, чтобы не допустить
травмы из-за падения телевизора.
13 Отсоединяйте устройство от сети во
время грозы или если оно не используется
длительное время.
14 Обслуживание должно осуществляться
только квалифицированным персоналом.
Обслуживание необходимо, если устройство
повреждено каким-либо образом,
например, если шнур питания или штекер
повреждены, на устройство попала жидкость
или посторонние предметы, устройство
подвергалось воздействию дождя или влаги,
работает не так, как ожидается, или его
уронили.
15 Данное оборудование — это
электрическое устройство класса II или
электрическое устройство с двойной
изоляцией. Оно спроектировано таким
образом, что его не требуется подключать к
заземлению.
16 Не ставьте на устройство предметы,
наполненные жидкостью, например, вазы.
17 Минимальное расстояние вокруг устройства
для достаточной вентиляции— 5см.
18 Не закрывайте вентиляционные отверстия
такими предметами, как газеты, скатерти,
шторы и т. д.
19 Не размещайте на устройстве источники
открытого пламени, такие как зажженные
свечи.
20 Батареи следует утилизировать в
соответствии с местными нормативными
требованиями.
21 Устройство можно использовать в умеренном
или тропическом климате.
CAUTION
RISK OF ELECTRIC SHOCK
DO NOT OPEN
ОСТОРОЖНО
РИСК УДАРА ЭЛЕКТРИЧЕСКИМ
ТОКОМ
НЕ ОТКРЫВАТЬ
Важные инструкции по технике
RU
4
Надлежащая утилизация данного
устройства. Эта маркировка указывает,
что данный продукт не следует
утилизировать вместе с бытовыми
отходами на территории ЕС. Чтобы
защитить окружающую среду и здоровье людей от
вредного воздействия отходов, утилизируйте данный
продукт надлежащим образом для повторного
использования материалов. Чтобы вернуть
использованное устройство, воспользуйтесь
системами возврата и сбора или обратитесь в магазин,
где продукт был приобретен. В этих учреждениях
продукт будет безопасно утилизирован.
Осторожно:
- Чтобы снизить риск удара электрическим током,
не подвергайте устройство воздействию дождя
или влаги. Устройство следует защитить от воды.
Не размещайте на нем предметы с жидкостью,
например, вазы.
- Штепсель/приборный соединитель используется
как устройство отключения, которое всегда
должно быть легкодоступно.
- При неправильной замене батареи возможен
взрыв. Заменяйте старые батареи только на
батареи того же или эквивалентного типа.
Внимание
Батареи (или комплект батарей) следует защищать
от перегрева, например от огня и других
источников тепла.
Перед использованием убедитесь, что напряжение
системы совпадает с напряжением источника
питания.
Не размещайте устройство рядом с сильными
магнитными полями.
Не размещайте устройство на усилителе или
аудиоресивере.
В случае попадания твердого предмета или
жидкости в систему, отсоедините ее от электросети
и отдайте на проверку квалифицированному
специалисту, перед тем как использовать ее снова.
Не пытайтесь очистить устройство химическими
растворителями, так как это может повредить
покрытие. Используйте чистую, сухую или слегка
смоченную тряпку для очистки.
При отсоединении штепселя от розетки всегда
беритесь за штепсель, никогда не тяните за кабель.
Изменения или модификации этого устройства, не
утвержденные напрямую стороной, ответственной
за соблюдение требований, может привести к
лишению пользователя права на эксплуатацию
оборудования.
Маркировочная этикетка размещена на нижней
или задней части оборудования.
МЕРЫ ПРЕДОСТОРОЖНОСТИ при
использовании батареек
Во избежание протекания батареек, что может
привести к травмам, материальному ущербу или
повреждению устройства:
- Установите все батарейки правильно, + и – в
соответствии с маркировкой на устройстве.
- Не используйте вместе новые и старые
батарейки.
- Не используйте вместе щелочные, стандартные
(угольно-цинковые) или перезаряжаемые (Ni-Cd,
Ni-MH и т. д.) батарейки.
- Вынимайте батарейки, если устройство не
используется в течение длительного времени.
Словесный товарный знак и логотип Bluetooth
являются зарегистрированными товарными знаками,
принадлежащими компании Bluetooth SIG, Inc.
Изготовлено по лицензии компании Dolby
Laboratories. Dolby, Dolby Audio и логотип с двумя
«D» являются товарными знаками Dolby Laboratories
Licensing Corporation.
Настоящим компания Hisense International
Co., Ltd заявляет, что 2.1-канальная
звуковая панель с беспроводным
сабвуфером соответствует основным
требованиям и другим соответствующим положениям
Директивы 2014/53/ЕС
HDMI является товарным знаком или
зарегистрированным товарным знаком HDMI
Licensing, LLC в США и/или других странах.
RU
5
Внешний вид и спецификации могут быть изменены без уведомления.
Шнур питания переменного тока
× 2
Пульт управления /
Батарейки типа ААА × 2
Беспроводной сабвуфер
Руководство пользователя /
Краткое руководство пользователя
Кабель HDMI
Основное устройство
Оптический кабель
Комплект для настенной установки
Что в упаковке
RU
6
Основное устройство
Указатель деталей
1 Окно отображения
Отображение текущего статуса.
2 Датчик пульта управления
Прием сигнала пульта управления.
3 Кнопка (ВКЛ/ВЫКЛ)
Переключение между РАБОЧИМ режимом и
режимом ОЖИДАНИЯ.
4 Кнопка (ИСТОЧНИК)
Выберите функцию воспроизведения.
5 Кнопка +/- (Vol+/Vol-)
Увеличить/уменьшить громкость.
6 Настенное крепление
Установите винты для настенного крепления
в настенное крепление устройства.
Беспроводной сабвуфер
1 Индикатор PAIR
Горит постоянно, если сопряжение
было выполнено.
2 Кнопка сброса
Нажмите кнопку на сабвуфере, синий
светодиод погаснет, и сабвуфер покажет
версию программного обеспечения.
Запись сопряжения будет удалена.
3 Разъем питания AC IN
Подключение линии электропитания.
7 Разъем питания AC IN
Подключение источника питания.
8 Гнездо USB
Подключение USB-устройства для
прослушивания музыки.
9 Разъем OPTICAL
Подключение к оптическому аудиовыходу
телевизора.
10 Разъем AUX
Подключение внешнего цифрового
аудиоустройства.
11 Разъем HDMI ARC
Подключение к телевизору с помощью
HDMI-кабеля.
12 Разъем COAXIAL
Подключение к коаксиальному аудиовыходу
телевизора.
RU
  • Page 1 1
  • Page 2 2
  • Page 3 3
  • Page 4 4
  • Page 5 5
  • Page 6 6
  • Page 7 7
  • Page 8 8
  • Page 9 9
  • Page 10 10
  • Page 11 11
  • Page 12 12
  • Page 13 13
  • Page 14 14
  • Page 15 15
  • Page 16 16
  • Page 17 17
  • Page 18 18
  • Page 19 19
  • Page 20 20
  • Page 21 21
  • Page 22 22
  • Page 23 23
  • Page 24 24
  • Page 25 25
  • Page 26 26
  • Page 27 27
  • Page 28 28
  • Page 29 29

Hisense HS212F Руководство пользователя

Тип
Руководство пользователя

Задайте вопрос, и я найду ответ в документе

Поиск информации в документе стал проще с помощью ИИ

на других языках