Sony XR-CA360EE Руководство пользователя

Категория
Кассетные плееры
Тип
Руководство пользователя
Operating Instructions
Руководство по эксплуатации
2003 Sony Corporation
GB
FM/AM
Cassette Car
Stereo
For installation and connections, see the supplied installation/connections
manual.
П орядок установки и подключения магнитолы описан в прилагаемой
инструкции об установке/подключении.
3-257-689-11 (1)
XR-CA360EE
RU
2
Welcome !
Thank you for purchasing this Sony Cassette
Player.
In addition to the cassette playback and radio
operations, you can expand your system by
connecting an optional CD/MD unit*
1
.
When you operate this unit or a connected
optional CD unit with the CD TEXT function,
the CD TEXT information will appear in the
display when you play a CD TEXT disc*
2
.
*
1
You can connect a CD changer, an MD changer,
a CD player, or an MD player.
*
2
A CD TEXT disc is an audio CD that includes
information such as the disc name, artist name,
and track names.
This information is recorded on the disc.
Precautions
If your car was parked in direct sunlight
resulting in a considerable rise in
temperature inside the car, allow the unit to
cool off before operating it.
If no power is being supplied to the unit,
check the connections first. If everything is in
order, check the fuse.
If no sound comes from the speakers of a
2-speaker system, set the fader control to the
center position.
When a tape is played back for a long period,
the cassette may become warm because of
the built-in power amplifier. However, this is
not a sign of malfunction.
If you have any questions or problems
concerning your unit that are not covered in
this manual, please consult your nearest Sony
dealer.
To maintain high quality sound
If you have drink holders near your audio
equipment, be careful not to splash juice or
other soft drinks onto the car audio. Sugary
residues on this unit or cassette tapes may
contaminate the playback heads, reduce the
sound quality, or prevent sound reproduction
altogether.
Cassette cleaning kits cannot remove sugar
from the tape heads.
3
Notes on Cassettes
Cassette care
Do not touch the tape surface of a cassette, as
any dirt or dust will contaminate the heads.
Keep cassettes away from equipment with
built-in magnets such as speakers and
amplifiers, as erasure or distortion on the
recorded tape could occur.
Do not expose cassettes to direct sunlight,
extremely cold temperatures, or moisture.
Slack in the tape may cause the tape to be
caught in the machine. Before you insert the
tape, use a pencil or similar object to turn the
reel and take up any slack.
Distorted cassettes and loose labels can cause
problems when inserting or ejecting tapes.
Remove or replace loose labels.
The sound may become distorted while
playing the cassette. The cassette player head
should be cleaned after each 50 hours of use.
Slack
Cassettes longer than 90 minutes
The use of cassettes longer than 90 minutes is
not recommended except for long continuous
play. The tape used for these cassettes is very
thin and tends to stretch easily. Frequent
playing and stopping of these tapes may cause
them to become entangled in the cassette deck
mechanism.
4
Table of Contents
This Unit Only
With Optional Equipment
Location of controls ................................................. 5
Getting Started
Resetting the unit ................................................ 6
Detaching the front panel .................................. 6
Setting the clock .................................................. 7
Cassette Player
Listening to a tape ............................................... 7
Radio reception during fast-forwarding or
rewinding of a tape
— Automatic Tuner Activation (ATA) ....... 8
Radio
Storing stations automatically
— Best Tuning Memory (BTM) ................... 8
Storing only the desired stations ...................... 9
Receiving the stored stations............................. 9
Other Functions
Adjusting the balance and fader ..................... 10
Attenuating the sound ..................................... 10
Changing the sound and display settings ..... 10
Setting the equalizer
— EQ3............................................................ 11
CD/MD Unit
Playing a CD or MD ......................................... 12
Playing tracks repeatedly
— Repeat Play .............................................. 13
Playing tracks in random order
— Shuffle Play .............................................. 13
Additional Information
Maintenance....................................................... 14
Removing the unit ............................................ 15
Specifications ..................................................... 16
Troubleshooting guide ..................................... 17
5
Location of controls
Refer to the pages listed for details.
1 SOURCE (Radio/CD/MD) button
8, 9, 11, 12
2 MODE button
During radio reception:
Band select 8, 9
During CD/MD playback:
CD/MD unit select 12
3 Volume +/– button 7, 10, 11
4 Z (eject) button 7, 8, 9, 12
5 Display window
6 m/M (fast winding)/DIR (tape
transport direction change) buttons 7, 8
7 SEEK button
Seek 9
Automatic Music Sensor 13
Manual search 13
8 DSPL (display mode change) button
7, 12
9 EQ3 button 11
q; RELEASE (front panel release) button
6, 14
qa SEL (select) button 7, 10, 11, 12
qs RESET button (located on the front side
of the unit behind the front panel) 6
qd ATT (attenuate) button 10
qf Number buttons 10, 12
During radio reception:
Preset number select 9
During CD/MD playback:
(1) DISC – 13
(2) DISC + 13
(3) REP 13
(4) SHUF 13
qg BTM/ATA button 8
qh SENS button 9
qj OFF button* 6
* Warning when installing in a car
without ACC (accessory) position on
the ignition key switch
Be sure to press (OFF) on the unit for 2
seconds to turn off the clock display after
turning off the engine.
When you press (OFF) momentarily, the
clock display does not turn off and this
causes battery wear.
XR-CA360EE
SOURCE
MODE
SEL
RELEASE
EQ3
DSPL
ATT
DISC
REP
SHUF
ATA
123456
BTM
OFFSENS
SEEK
DIR
66
Attaching the front panel
Attach part A of the front panel to part B of
the unit as illustrated and push the left side
into position until it clicks.
Notes
Be sure not to attach the front panel upside
down.
Do not press the front panel too hard against the
unit when attaching it.
• Do not press too hard or put excessive pressure
on the display window of the front panel.
Do not expose the front panel to direct sunlight
or heat sources such as hot air ducts, and do not
leave it in a humid place. Never leave it on the
dashboard of a car parked in direct sunlight or
where there may be a considerable rise in
temperature.
Caution alarm
If you turn the car ignition off without
removing the front panel, the caution alarm
will beep for a few seconds.
If you connect an optional power amplifier and
do not use the built-in amplifier, the beep
sound will be deactivated.
Getting Started
Resetting the unit
Before operating the unit for the first time, or
after replacing the car battery or changing the
connections, you must reset the unit.
Remove the front panel and press the RESET
button with a pointed object, such as a
ballpoint pen.
Note
Pressing the RESET button will erase the clock
setting and some memorised functions.
Detaching the front panel
You can detach the front panel of this unit to
protect the unit from being stolen.
1 Press (OFF).
2 Press (RELEASE), then slide the front
panel a little to the left, and pull it off
towards you.
Notes
Be sure not to drop the panel when detaching it
from the unit.
If you detach the panel while the unit is still
turned on, the power will turn off automatically
to prevent the speakers from being damaged.
When carrying the front panel with you, use the
supplied front panel case.
RESET button
(OFF)
(RELEASE)
A
B
77
Cassette Player
Listening to a tape
Insert a cassette.
Playback starts automatically.
The side facing up is played.
The side facing down is played.
Tip
To change the tape‘s playback direction, press m
and M.
To stop playback and eject the
cassette
Press Z.
Fast-winding the tape
During playback, press m or M.
* The indicator will flash while fast-winding the
tape.
To start playback during fast-forwarding or
rewinding, press the other fast-winding button
partially until the locked button is released.
To rewind
m
M
Direction
indicator*
FWD
REV
To advance
M
m
Setting the clock
The clock uses a 24-hour digital indication.
Example: To set the clock to 10:08
1 Press (DSPL) for 2 seconds.
The hour indication flashes.
1 Press either side of the volume button
to set the hour.
2 Press (SEL).
The minute indication flashes.
3 Press either side of the volume button
to set the minute.
2 Press (DSPL).
The clock starts.
After the clock setting is complete, the
display returns to normal play mode.
to go forward
to go back
to go forward
to go back
88
Radio
Storing stations
automatically
— Best Tuning Memory (BTM)
The unit can store up to 6 stations per band
(FM1, FM2, FM3*, AM1 and AM2).
* FM3 tuning range is 65 to 74 MHz (at 30 kHz
step).
Caution
When tuning in stations while driving, use
Best Tuning Memory to prevent accidents.
1 Press (SOURCE) repeatedly to select the
radio.
In case of tape playback, press Z to eject the
tape.
Each time you press (SOURCE), the source
changes as follows:
Radio t CD* t MD*
* If the corresponding optional equipment is
not connected, this item will not appear.
2 Press (MODE) repeatedly to select the
band.
Each time you press (MODE), the band
changes as follows:
FM1 t FM2 t FM3 t AM1 t AM2
3 Press (BTM) (ATA) for 2 seconds.
The unit stores stations in the order of their
frequencies on the number buttons.
A beep sounds when the setting is stored.
Notes
The unit does not store stations with weak
signals. If only a few stations can be received,
some number buttons will retain their former
setting.
• When a number is indicated in the display, the
unit starts storing stations from the one currently
displayed.
Radio reception during
fast-forwarding or
rewinding of a tape
— Automatic Tuner Activation (ATA)
When fast-forwarding or rewinding with the
m or M button, the radio will turn on
automatically.
During playback, press (BTM) (ATA)
repeatedly until “ATA-ON” in the display
appears.
ATA-ON y ATA-OFF
ATA mode starts.
To return to normal play mode, select “ATA-
OFF.”
99
Storing only the desired
stations
You can preset up to 18 FM stations (6 each for
FM1, 2, and 3), up to 12 AM stations (6 each for
AM1 and 2) in the order of your choice.
1 Press (SOURCE) repeatedly to select the
radio.
In case of tape playback, press Z to eject the
tape.
2 Press (MODE) repeatedly to select the
band.
3 Press either side of (SEEK) to tune in the
station that you want to store on the
number button.
4 Press the desired number button ((1) to
(6)) until “MEM” appears.
The number button indication appears in
the display.
Note
If you try to store another station on the same
number button, the previously stored station will
be erased.
Receiving the stored
stations
1 Press (SOURCE) repeatedly to select the
radio.
In case of tape playback, press Z to eject the
tape.
2 Press (MODE) repeatedly to select the
band.
3 Press the number button ((1) to (6)) on
which the desired station is stored.
If you cannot tune in a preset
station
— Automatic tuning/Local Seek Mode
Automatic tuning:
Press either side of (SEEK) to search for
the station.
Scanning stops when the unit receives a
station. Press either side of (SEEK)
repeatedly until the desired station is
received.
Local Seek Mode:
If the automatic tuning stops too
frequently, press (SENS) repeatedly until
“LOCAL-ON” appears.
“LCL” indicator is displayed.
Only the stations with relatively strong
signals will be tuned in.
Tip
If you know the frequency of the station you want
to listen to, press either side of (SEEK) until the
desired frequency appears (manual tuning).
If FM stereo reception is poor
— Monaural Mode
During radio reception, press (SENS)
repeatedly until “MONO-ON” appears.
“MONO” indicator is displayed.
The sound improves, but becomes
monaural (“ST” disappears).
To return to normal radio reception mode,
select “MONO-OFF.”
10
Changing the sound and
display settings
The following items can be set:
A.SCRL (Auto Scroll)* (page 12).
M.DSPL (Motion Display)
– the demonstration mode which appears
when the tape is ejected and no source is
selected (e.g., tuner is turned off).
BEEP – to turn the beep sound on or off.
1 Press (SEL) and the desired preset
number button simultaneously.
(SEL) + (3): A.SCRL*
(SEL) + (4): M.DSPL
(SEL) + (6): BEEP
* When no CD or MD is playing, this item will
not appear.
2 Press (SEL) and the preset number
button repeatedly to select the desired
setting (Example: ON or OFF).
Other Functions
Adjusting the balance and
fader
You can adjust the balance and fader.
1 Press (SEL) repeatedly until “BAL” or
“FAD” appears.
Each time you press (SEL), the item
changes as follows:
LOW* t MID* t HIGH* t
BAL (left-right) t FAD (front-rear)
* When EQ3 is activated (page 11).
2 Press either side of the volume button to
adjust the selected item.
Adjust within 3 seconds after selecting the
item.
Attenuating the sound
Press (ATT).
After “ATT-ON” momentarily flashes, the
“ATT” indication appears in the display.
To restore the previous volume level, press
(ATT) again.
“ATT-OFF” flashes momentarily.
11
Setting the equalizer
— EQ3
You can select an equalizer curve for 7 music
types (XPLOD, VOCAL, CLUB, JAZZ, NEW
AGE, ROCK, CUSTOM, and OFF (equalizer
OFF)).
You can store a different equalizer setting for
each source.
Selecting the equalizer curve
1 Press (SOURCE) to select a source (Radio,
CD or MD) or insert a cassette.
2 Press (EQ3) repeatedly to select the
desired equalizer curve.
Each time you press (EQ3), the item
changes.
To cancel the equalizing effect, select
“OFF.”
Adjusting the equalizer curve
You can store and adjust the equalizer settings
for different tone ranges.
1 Press (SOURCE) to select a source (Radio,
CD or MD) or insert a cassette.
2 Press (EQ3) repeatedly to select the
desired equalizer curve.
3 Adjusting the equalizer curve.
1 Press (SEL) repeatedly to select the
desired tone range.
Each time you press (SEL), the tone
range changes.
LOW t MID t HI (t BAL t FAD)
2 Press either side of the volume button
repeatedly to adjust to the desired
volume level.
The volume level is adjustable by 1 dB
steps from –10 dB to +10 dB.
3 Repeat step 1 and 2 to adjust the
equalizer curve.
To restore the factory-set equalizer
curve, press (SEL) for 2 seconds.
After 3 seconds, the display returns to
normal play mode.
Note
When EQ3 is set to “OFF,” you cannot adjust the
equalizer settings.
12
Automatically scrolling a display
item — Auto Scroll
If the disc name, artist name, or track name on
a CD TEXT disc or MD exceeds 8 characters
and the Auto Scroll function is on, information
automatically scrolls across the display as
follows:
The disc name appears when the disc has
changed (if the disc name is selected).
The track name appears when the track has
changed (if the track name is selected).
If you press (DSPL) to change the display
item, the disc or track name of the CD TEXT or
MD disc is scrolled automatically whether you
set the function ON or OFF.
During playback, press (SEL) and (3) to
select “A.SCRL-ON.”
To cancel Auto Scroll, select “A.SCRL-OFF.”
Note
For some discs with very many characters, the
following cases may happen:
Some of the characters are not displayed.
Auto Scroll does not work.
With Optional Equipment
CD/MD Unit
This unit can control external CD/MD units.
If you connect an optional CD unit with the
CD TEXT function, the CD TEXT information
will appear in the display when you play a CD
TEXT disc.
Playing a CD or MD
1 Press (SOURCE) repeatedly to select CD
or MD.
In case of tape playback, press Z to eject the
tape.
2 Press (MODE) until the desired unit
appears.
CD/MD playback starts.
When a CD/MD unit is connected, all the
tracks play from the beginning.
Tip
With the optional MG Memory Stick System-up
Player MGS-X1 connected to this unit, press
(SOURCE) to select “MD,” then press (MODE) to
select the unit number of the MD (MD1 or MD2,
etc.).
Changing the display item
Each time you press (DSPL) during CD, CD
TEXT, or MD playback, the item changes as
follows:
Elapsed playback time t
Disc name*
1
/Artist name*
2
t Track name*
3
t
Clock
*
1
If you have not labeled the disc or if there is no
disc name prerecorded on the MD, “NO NAME”
appears in the display.
*
2
If you play a CD TEXT disc, the artist name
appears in the display after the disc name. (Only
for CD TEXT discs with the artist name.)
*
3
If the track name of a CD TEXT disc or MD is not
prerecorded, “NO NAME” appears in the
display.
13
Locating a specific track
— Automatic Music Sensor (AMS)
During playback, press either side of
(SEEK) momentarily for each track you
want to skip.
Locating a specific point in a track
— Manual Search
During playback, press and hold either
side of (SEEK). Release when you have
found the desired point.
Switching to other discs
During playback, press (1) (DISC –) or
(2) (DISC +) button.
The desired disc in the current unit begins
playback.
(1) (DISC –): For preceding discs
(2) (DISC +): For succeeding discs
To locate succeeding tracks
To locate preceding tracks
To search forward
To search backward
Disc number
Track number
SEEK
SEEK
Playing tracks repeatedly
— Repeat Play
You can select:
REP-TRACK – to repeat a track.
REP-DISC – to repeat a disc.
During playback, press (3) (REP)
repeatedly until the desired setting
appears.
REP-TRACK t REP-DISC t REP-OFF
Repeat Play starts.
To return to normal play mode, select “REP-
OFF.”
Playing tracks in random
order — Shuffle Play
You can select:
SHUF-DISC – to play the tracks on the
current disc in random order.
SHUF-CHGR – to play the tracks in the
current unit in random order.
SHUF-ALL* – to play all the tracks in all the
units in random order.
During playback, press (4) (SHUF)
repeatedly until the desired setting
appears.
SHUF-DISC t SHUF-CHGR t SHUF-ALL*
t SHUF-OFF
Shuffle Play starts.
* “SHUF-ALL” is only available when you
connect two or more optional CD/MD units.
To return to normal play mode, select “SHUF-
OFF.”
14
Cleaning the connectors
The unit may not function properly if the
connectors between the unit and the front
panel are not clean. In order to prevent this,
open the front panel by pressing (RELEASE),
then detach it and clean the connectors with a
cotton swab dipped in alcohol. Do not apply
too much force. Otherwise, the connectors may
be damaged.
Main unit
Back of the front panel
Notes
For safety, turn off the engine before cleaning
the connectors and remove the key from the
ignition switch.
Never touch the connectors directly with your
fingers or any metal device.
Fuse (10 A)
Additional
Information
Maintenance
Fuse replacement
When replacing the fuse, be sure to use one
matching the amperage rating stated on the
original fuse. If the fuse blows, check the
power connection and replace the fuse. If the
fuse blows again after replacement, there may
be an internal malfunction. In such a case,
consult your nearest Sony dealer.
Warning
Never use a fuse with an amperage rating
exceeding the one supplied with the unit as
this could damage the unit.
15
Removing the unit
1 Remove the protection collar.
1 Detach the front panel (page 6).
2 Engage the release keys together
with the protection collar.
3 Pull out the release keys to remove
the protection collar.
2 Remove the unit.
1 Insert both release keys together until
they click.
2 Pull the release keys to unseat the
unit.
3 Slide the unit out of the mounting.
Face the hook
inwards.
Orient the release
key correctly.
16
Specifications
Cassette player section
Tape track 4-track 2-channel stereo
Wow and flutter 0.13 % (WRMS)
Frequency response 30 – 15,000 Hz
Signal-to-noise ratio 55 dB
Tuner section
FM
Tuning range FM1/FM2
87.5 – 108.0 MHz
(at 50 kHz step)
FM3
65.0 – 74.0 MHz
(at 30 kHz step)
Aerial terminal External aerial connector
Intermediate frequency 10.7 MHz/450 kHz
Usable sensitivity 9 dBf
Selectivity 75 dB at 400 kHz
Signal-to-noise ratio 67 dB (stereo),
69 dB (mono)
Harmonic distortion at 1 kHz
0.5 % (stereo),
0.3 % (mono)
Separation 35 dB at 1 kHz
Frequency response 30 – 15,000 Hz
AM
Tuning range 531 – 1,602 kHz
Aerial terminal External aerial connector
Intermediate frequency 10.7 MHz/450 kHz
Sensitivity 30 µV
Power amplifier section
Outputs Speaker outputs
(sure seal connectors)
Speaker impedance 4 – 8 ohms
Maximum power output 45 W × 4 (at 4 ohms)
General
Outputs Audio output
Power aerial relay control
lead
Power amplifier control
lead
Inputs BUS control input terminal
BUS audio input terminal
Tone controls Low:
±10 dB at 60 Hz (XPLOD)
Mid:
±10 dB at 1 kHz (XPLOD)
High:
±10 dB at 10kHz (XPLOD)
Power requirements 12 V DC car battery
(negative earth)
Dimensions Approx. 178 × 50 × 178 mm
(w/h/d)
Mounting dimensions Approx. 182 × 53 × 161 mm
(w/h/d)
Mass Approx. 1.2 kg
Supplied accessories Parts for installation and
connections (1 set)
Front panel case (1)
Optional accessories BUS cable (supplied with
an RCA pin cord)
RC-61 (1 m), RC-62 (2 m)
Optional equipment CD changer (10 discs)
CDX-656X
CD changer (6 discs)
CDX-T69X
MD changer (6 discs)
MDX-66XLP
MG-MS System-up Player
MGS-X1
DVD changer
DVX-100S
Source selector
XA-C30
AUX-IN Selector
XA-300
Design and specifications are subject to change
without notice.
17
Troubleshooting guide
The following checklist will help you remedy the problems you may encounter with your unit.
Before going through the checklist below, check the connections and operating procedures.
General
Tape playback
Problem
The sound is distorted.
Cause/Solution
The tape head is contaminated.
t Clean the head with a commercially available dry-type
cleaning cassette.
Radio reception
Problem
Preset tuning is not possible.
Automatic tuning is not
possible.
The stations cannot be
received.
The sound is hampered by
noises.
The “ST” indication flashes.
Cause/Solution
Store the correct frequency in the memory.
The broadcast signal is too weak.
t Use manual tuning.
The local seek mode is set to ON.
t Set the local seek mode to OFF (page 9).
Connect an power aerial control lead (blue) or accessory power
supply lead (red) to the power supply lead of a car’s aerial
booster. (When your car has built-in FM/AM aerial in the
rear/side glass only.)
Tune in the frequency accurately.
The broadcast signal is too weak.
t Set to monaural mode (page 9).
Problem
No sound.
The contents of the memory
have been erased.
Indications do not appear
in the display.
Cause/Solution
Cancel the ATT function (page 10).
Set the fader control to the center position for 2-speaker
systems.
Adjust the volume with (+).
The power cord or battery has been disconnected.
The RESET button was pressed.
t Store again into the memory.
Remove the front panel and clean the connectors. See
“Cleaning the connectors” (page 14) for details.
The clock display disappears if you press (OFF) for 2
seconds.
t Press (OFF) again for 2 seconds to display the clock.
Problem
The sound skips.
Cause/Solution
A dirty or defective disc.
CD/MD playback
continue to next page t
18
Error displays (when an optional CD/MD unit is connected)
The following indications will flash for about 5 seconds, and an alarm sound will be heard.
*
1
When an error occurs during playback of a CD or MD, the disc number of the CD or MD does not appear
in the display.
*
2
The disc number of the disc causing the error appears in the display.
If the above-mentioned solutions do not help improve the situation, consult your nearest Sony
dealer.
Solution
Insert the disc magazine in the CD/
MD unit.
Insert discs in the CD/MD unit.
Clean or insert the CD correctly.
Insert another MD.
Insert another CD/MD.
Play an MD with tracks recorded on
it.
Press the RESET button of the unit.
Close the lid or insert the MDs
properly.
Wait until the temperature goes
down below 50°C.
Display
NO MAG
NO DISC
ERROR
BLANK
RESET
NOT READY
HI TEMP
Cause
The disc magazine is not inserted in
the CD/MD unit.
No disc is inserted in the CD/MD unit.
A CD is dirty or inserted upside
down.*
2
An MD does not play because of some
problem.*
2
A CD/MD cannot play because of
some problem.
No tracks have been recorded on an
MD.*
2
The CD/MD unit cannot be operated
because of some problem.
The lid of the MD unit is open or MDs
are not inserted properly.
The ambient temperature is more than
50°C.
*
1
*
1
19
2
Поздравляем с покупкой!
Благодарим Вас за приобретение
кacceтной мaгнитолы Sony.
В дополнение к функции воспроизведения
кассетных записей и операциям с
радиоприемником Вы можете расширить
Вашу стереосистему, подключив к ней
приобретенный отдельно проигрыватель
компакт-/мини-дисков (CD/MD)*
1
.
При использовании данной магнитолы или
подключенного дополнительного
проигрывателя компaкт-диcков с функцией
CD TEXT для воспроизведения компакт-
диска CD TEXT*
2
информация с этого
диска выводится на дисплей магнитолы.
*
1
К магнитоле можно подключить устройство
для смены компакт-дисков, устройство для
смены мини-дисков, проигрыватель компакт-
дисков или проигрыватель мини-дисков.
*
2
Диск CD TEXT - это звуковой компакт-диск,
содержащий, в частности, информацию о
названии диска, исполнителе и названиях
дорожек.
Эта информация записана на диске.
Меры
предосторожности
Ecли Ваш автомобиль был запаркован на
солнцепеке, в результате чего произошло
значительное повышение температуры в
его салоне, дайте магнитоле остыть,
прежде чем начать ее эксплуатацию.
Ecли на магнитолу не поступает питание,
проверьте сначала контакты. Если все в
порядке, проверьте предохранитель.
Ecли с громкоговорителей стереосистемы
с двумя громкоговорителями не
поступает звук, установите регулятор
балансировки переднего/заднего
громкоговорителей в среднее положение.
При длительном прослушивании одной и
той же кассеты она может нагреться от
встроенного усилителя. Это, однако, не
является признаком неисправности.
В случае возникновения каких-либо
вопросов или проблем, связанных с
магнитолой и нe paccмотpeнныx в данном
Руководстве по эксплуатации, обратитесь,
пожалуйста, за консультацией к
ближайшему дилеру фирмы “Sony”.
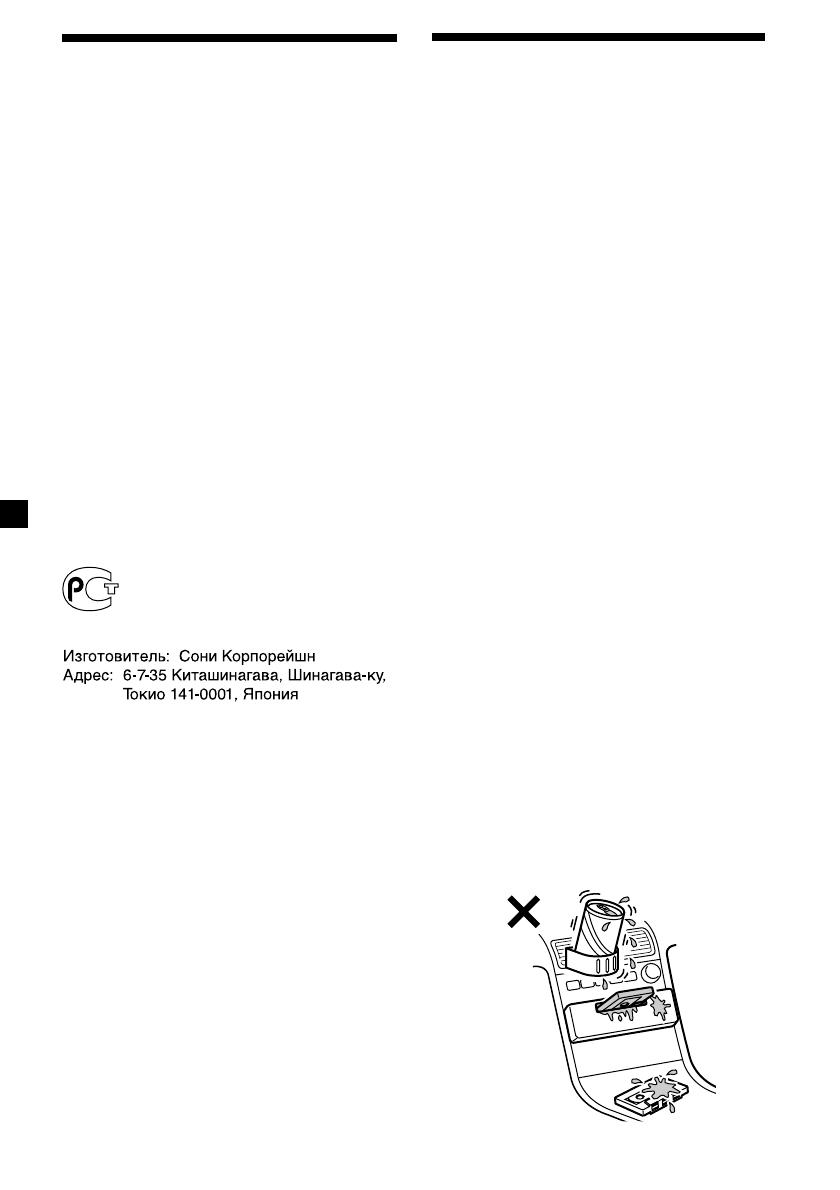
Во избежание ухудшения качества
звука
Если вблизи магнитолы в салоне Вашего
автомобиля расположены подставки для
стаканов, следите за тем, чтобы на нее не
пролились соки или другие
прохладительные напитки. Сахарный
налет, оставшийся от них на деталях
аппарата или на магнитной ленте, может
загрязнить воспроизводящие головки,
ухудшив тем самым качество звучания или
вообще сделав воспроизведение звука
невозможным.
Загрязненные сахарным налетом
магнитофонные головки не поддаются
очистке с помощью чиcтящиx кассет.
Кacceтнaя cтepeофоничecкaя
aвтомaгнитолa c диaпaзоном
FM/AM
Cдeлaно в Малайзии
  • Page 1 1
  • Page 2 2
  • Page 3 3
  • Page 4 4
  • Page 5 5
  • Page 6 6
  • Page 7 7
  • Page 8 8
  • Page 9 9
  • Page 10 10
  • Page 11 11
  • Page 12 12
  • Page 13 13
  • Page 14 14
  • Page 15 15
  • Page 16 16
  • Page 17 17
  • Page 18 18
  • Page 19 19
  • Page 20 20
  • Page 21 21
  • Page 22 22
  • Page 23 23
  • Page 24 24
  • Page 25 25
  • Page 26 26
  • Page 27 27
  • Page 28 28
  • Page 29 29
  • Page 30 30
  • Page 31 31
  • Page 32 32
  • Page 33 33
  • Page 34 34
  • Page 35 35
  • Page 36 36

Sony XR-CA360EE Руководство пользователя

Категория
Кассетные плееры
Тип
Руководство пользователя

Задайте вопрос, и я найду ответ в документе

Поиск информации в документе стал проще с помощью ИИ

на других языках