Yamaha HTR-4064 Инструкция по применению

Категория
Аудио-видео ресиверы
Тип
Инструкция по применению

Это руководство также подходит для

INFO
MEMORY
PRESET
FM
AM
TUNING
VOLUME
VIDEOPORTABLE L AUDIO R
STRAIGHT
TONE CONTROL
BD
DVD
TV
CD RADIO
SILENT CINEMA
SCENE
NATURAL SOUND AV RECEIVER RX-V471
INFO
MEMORY
PRESET
FM
AM
TUNING
VOLUME
STRAIGHT
TONE CONTROL
BD
DVD
TV
CD RADIO
SILENT CINEMA iPod/iPhone
SCENE
DIRECT
PHONES
USB
PROGRAM
INPUT
YPAO MIC
VIDEO AUX
Check that the following accessories are supplied with the unit.
* The supplied FM antenna will differ depending on your country or region.
Prepare the following cables (not supplied) for connection according to the instructions
in this guide.
A digital optical cable is not required when your TV supports the Audio Return Channel (ARC)
function.
1 Preparation
Accessories
Remote control Batteries (AAA, R03, UM-4) x 2
Insert the batteries into the battery case in correct directions
(+ and -).
AM antenna FM antenna* VIDEO AUX input
cover
YPAO microphone
CD-ROM
(Owner’s Manual)
Easy Setup Guide
(this manual)
Safety Brochure
Preparing cables
Speaker cable (for each speaker) HDMI cable x 2
Monaural pin cable x 1 Digital optical cable x 1
AV Receiver
Easy Setup Guide
The Easy Setup Guide explains the general procedures for setting up the 5.1-
channel system and how to produce surround sounds from BD/DVD.
For more details, please refer to the “Owner’s Manual” contained in the CD-ROM.
About the symbols in this manual.
” indicates the explanations for better use.
” indicates the cautions concerning operations or setup of the unit.
A PDF format of this guide and the “Owners Manual” can be downloaded from
the following website.
http://download.yamaha.com/
English for North America, Europe
and Oceania
2
Place the speakers in as shown below. Other layouts (except for 5.1-channel speaker layout) are shown in the “Owner’s Manual.”
2 Placing speakers
5.1-channel system
80° 80°
Front speaker (L)
Front speaker (R)
Center speaker
Surround speaker (L)
Surround speaker (R)
Subwoofer
3
Connecting speaker cables
Speaker cables have two wires. One is for connecting the
negative (-) terminal of the unit and the speaker, and the
other is for the positive (+) terminal. If the wires are color-
coded to prevent confusion, you should connect the black
side to the negative terminal and the other wire to the
positive terminal.
1 Remove approximately
10 mm (0.4 in.) of insulation
from the end of the speaker
cable and twist the bare wire
firmly.
2 Loosen the speaker terminal.
3 Insert the bare wire into the
gap on the side of the terminal.
When it is difficult to insert the wire into the gap on the
side, insert it into the gap downside of terminal.
4 Tighten the terminal.
Connecting banana plugs
(Except U.K. and Europe models)
Tighten the knob, and then
insert the banana plug into the
end of the terminal.
1 Connect the front speakers ( / ) to
the FRONT ( / ) terminals.
2 Connect the center speaker ( ) to the
CENTER terminal.
3 Connecting speakers
(U.S.A. and Canada models only) The unit is configured to
8Ω speakers as the factory setting. 6Ω speakers can be also
connected.
(Except for U.S.A. and Canada models) Use the speakers
with an impedance of at least 6Ω.
Use a subwoofer with a built-in amplifier.
Disconnect the power plug before connecting the speakers.
Be careful that the core of the speaker cable does not touch
anything or come into contact with the metal areas of the unit.
If this happens, it may damage the unit or the speakers. If the
speaker cables short circuit, “CHECK SP WIRES!” will appear
on the front panel display when the unit is switched on.
F
R
O
N
T
+ (Red)
- (Black)
F
RONT
Banana plug
FRONT CENTER SURROUND
SUBWOOFER
R L R L
SPEAKERS
The unit (rear)
FRONT CENTER SURROUND
SUBWOOFER
R L R L
SPEAKERS
The unit (rear)
4
3 Connect the surround speakers ( / )
to the SURROUND ( / ) terminals.
4 Connect the subwoofer ( ) to the
SUBWOOFER jack.
Before connecting the subwoofer, turn off the
subwoofer.
Use a monaural pin
cable to connect the
subwoofer.
3
FRONT CENTER SURROUND
SUBWOOFER
R L R L
SPEAKERS
The unit (rear)
FRONT CENTER SURROUND
SUBWOOFER
R L R L
SPEAKERS
The unit (rear)
Monaural
pin cable
5
4 Connecting external devices
HDMI 1
(BD/DVD)
HDMI 2
HDMI 3
HDMI 4
75Ω
P
R
P
B
Y
MONITOR OUT
AM FM
ANTENNA
VIDEO
AV 1
OPTICAL
AV 2 AV 3 AV 4 AV 5 AV 6
AV
OUT
AUDIO
COAXIAL COAXIAL
(CD) (TV)
OPTICAL
COMPONENT
VIDEO
FRONT CENTER SURROUND
R
L
HDMI OUT
L
R
L
R
SPEAKERS
MONITOR OUT
ARC
AV 2AV 1
COAXIALOPTICAL
HDMI
HDMI
OPTICAL
HDMI
HDMI
HDMI OUT
ARC
HDMI
HDMI 1
(BD/DVD)
HDMI1
HDMI
AV 4
(
TV
)
OPTICAL
O
O
INFO MEMORY PRESET FM AM TUNING
DIRECT
VOLUME
VIDEOPORTABLE L AUDIO R
VIDEO AUX
STRAIGHTTONE CONTROL
BD
DVD
TV CD RADIO
PHONES
SILENT CINEMA iPod/iPhone
USB
PROGRAM
SCENE
INPUT
YPAO MIC
NATURAL SOUND AV RECEIVER RX-V471
SUBWOOFER
DOCK
Plug into an
electric outlet
BD/DVD player
HDMI input HDMI output
TV
Audio output
(Digital optical)
HDMI1 jackHDMI OUT jack
AV4 (OPTICAL)
jack
Turn on the
unit
The unit (rear)
The unit (front)
1 Connect external devices to the unit.
1 Connect a BD/DVD player to the unit with an HDMI
cable.
If the BD/DVD player are connected to a TV directly
with an HDMI cable, disconnect the cable from the
TV and connect it to the unit.
2 Connect the TV to the unit with an HDMI cable.
3 Connect the TV to the unit with an optical cable.
This connection enables the TV audio to be played
through the unit. If your TV supports the Audio
Return Channel function (ARC), this connection is
unnecessary.
4 Connect the power cable to an electric outlet.
For connecting other devices, such as a radio antenna,
refer to “SETUP” in the “Owner’s Manual.
2 Turn on the TV, BD/DVD player and the unit.
3 Confirm that the video images input from
BD/DVD player is displayed on the TV
screen.
a Change video input source for the TV to the unit.
b Press HDMI1 to select “HDMI1” as the input source.
If the video image input from BD/DVD player is
displayed on the TV screen, all settings have been
completed.
Go to the next page, and refer to “Optimizing the
speaker settings automatically (YPAO).”
6
The YPAO microphone (supplied) detects the status of speaker connections and the distance between the speakers and
the listening position, and adjusts the volume balance and the tone settings automatically (YPAO: Yamaha Parametric
room Acoustic Optimizer).
Preparation before using YPAO
5
Optimizing the speaker settings automatically (YPAO)
The volume level is fixed to 0 dB while measuring.
The test tone is output at a high volume while measuring. Be
careful that the test tone does not frighten any small children.
The room must be quiet while measuring.
Do not connect headphones to the unit.
YPAO measurement does not work correctly if any obstacles are
in the room. Move everything out of the room or place it in the
corners while measuring. It takes approximately three minutes
to finish this measurement.
VOLUME HIGH CUT
CROSSOVER/
MIN MAXMIN MAX
Turn on the subwoofer
and set its volume to
approximately half.
And, set the cross-
over frequency (if
available) to
maximum.
When a subwoofer
with the automatic
standby function (turn
off automatically
during no signals
input) is used, disable
the function before
going to the next step.
Set the YPAO microphone at the height
of your ears. We recommend that you
use equipment that allows you to adjust
the height (such as a tripod) as a
microphone stand. If you are using a
tripod, use the tripod screws to fix the
microphone in place.
The unit (front)
YPAO microphone
listening position
The height of
your ears
(If necessary) Select the language displayed on the TV screen with
“Language” in the “Setup” menu referring to “Owner’s Manual” (p.71).
SCENE
RETURN
VOLUME
ENHANCER
SLEEP DIRECT
HDMI
AV
1234
[ A ]
V-AUX
FM
INFO
MEMORY
AM
PRESET
MOVIE MUSIC
BD
DVD
TV
CD
RADIO
MUTE
ENTER
7856
90
10
1234
MODE
ENT
TV
TV VOL TV CH
TOP
MENU
POP-UP
MENU
DISPLAY
SOURCE
RECEIVER
CODE SET
INPUT
MUTE
DOCK
USB
AUDIO
OPTION
SETUP
5
1234
6
TUNER
TUNING
STRAIGHT
SUR. DECODE
SC
ENE
V
O
LUM
E
E
NHAN
C
E
R
S
LEE
P
DIRE
CT
HDMI
V
A
A
1
2
3
[
A
]
V
-
V
V
A
UX
M
O
VIE
MU
S
I
C
BD
D
VD
TV
C
D
R
ADI
O
MUTE
7
8
5
6
9
0
10
1
2
3
4
M
O
DE
ENT
TV
TV
V
OL
TV
CH
T
OP
MENU
PO
P-
U
P
M
ENU
DI
S
P
L
A
Y
A
A
SO
UR
CE
R
E
C
EIVER
CODE SE
T
INPUT
M
UT
E
DOCK
U
SB
A
UDI
O
FM
MEM
O
R
Y
AM
P
RESE
T
I
NF
O
OPTIO
N
5
1
2
3
4
6
T
UNER
TUNIN
G
4
S
TRAIGH
T
S
U
R
.
DE
CO
DE
ENTER
RETURN
SETUP
Cursor keys
1 Connect YPAO microphone to the YPAO
MIC jack on the front panel.
The following image is displayed on the TV screen.
To cancel the measurement, disconnect the YPAO
microphone before measuring starts.
2 Confirm that “Start” is selected, and then
press SETUP.
The measurement starts in ten seconds.
After the measurement is complete, the following
image is displayed on the TV screen.
When “W-1:Out of Phase” appears, refer to ‘When “W-1:
Out of Phase” appears’ on the next page.
If a message such as an error message and warning
appears, refer to “Error messages” and “Warning
messages” in the “Owner’s Manual.
7
3 Confirm that “Save / Exit” is selected, and
then press ENTER.
4 Confirm that “SAVE” is selected, and then
press ENTER.
5 Remove the YPAO microphone from the
unit.
All the settings for the speakers are complete.
Use the following procedure to check the speaker
connections.
Warning messages may appear depending on the types
of speakers or the place where you set them even if they
are connected correctly.
a Press the cursor key to select “Result,” and then press
ENTER.
b Confirm that “Wiring” is selected.
c Check the cable connection (+ and -) of the speaker
indicated as red-boxed “Reverse.
If the speakers are connected correctly:
Save the results of the measurement.
Press RETURN, and go to step 3 on the left column.
If the speakers are connected incorrectly:
Turn off the unit and connect the speaker cables again,
and then try YPAO measurement again.
The YPAO microphone is sensitive to heat. Protect the YPAO
microphone from high temperatures (such as from AV
equipment) and direct sunlight.
When “W-1: Out of Phase” appears
Let’s play a BD/DVD disc. We recommend playing back a disc recorded with multi-channel sound (up to 5.1-ch) to enjoy
the surround sound effects enough.
1 Press HDMI1 to select “HDMI1” as the input
source.
2 Play a BD/DVD with a BD/DVD player.
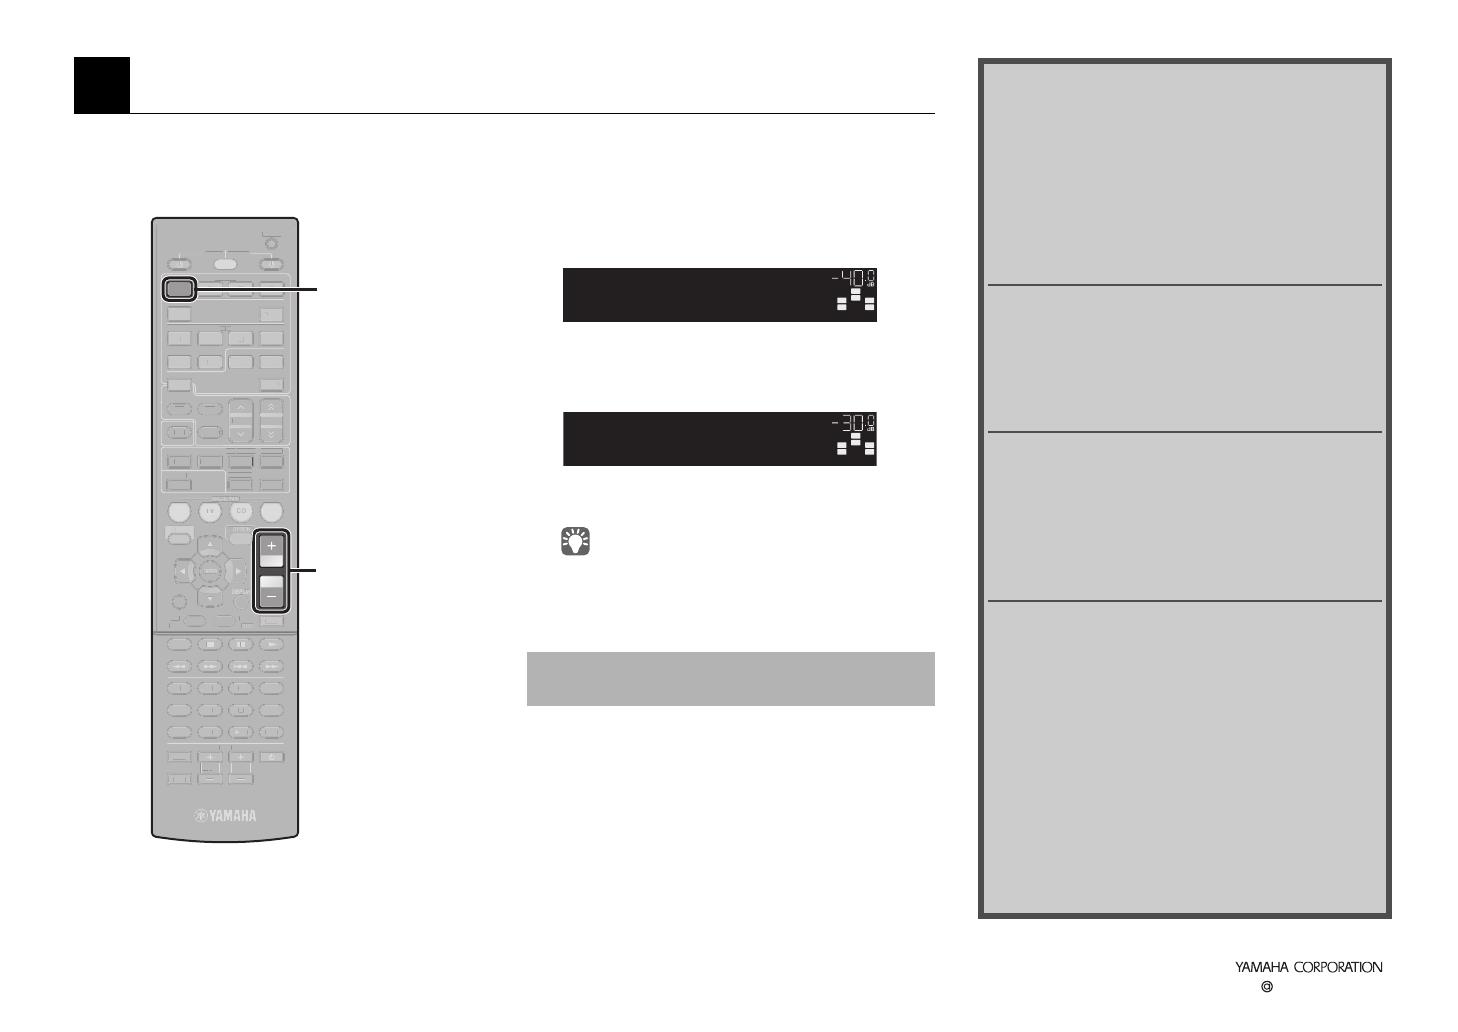
3 Press VOLUME to adjust the volume.
The 5.1-channel system is installed and the
procedures to play a BD/DVD are complete.
“STRAIGHT” is set to the sound program as the initial
settings. “STRAIGHT” (straight decoding) is the sound
program which output recorded sound from each channel
directly from each speaker.
Sound is only output from front speakers even when
playing multi-channel source
Confirm the digital audio output settings of the BD/DVD
player.
Signals may be set to normally output on 2 channels (such as
PCM).
No sound is output from a specific speaker
Refer to “Troubleshooting” in the “Owner’s Manual.”
6 Playing back a BD/DVD
RETURN
VOLUME
ENHANCER
SLEEP DIRECT
HDMI
AV
1234
[ A ]
V-AUX
FM
INFO
MEMORY
AM
PRESET
MOVIE MUSIC
BD
DVD
RADIO
MUTE
7856
90
10
1234
MODE
ENT
TV
TV VOL TV CH
TOP
MENU
POP-UP
SOURCE
RECEIVER
CODE SET
INPUT
MUTE
DOCK
USB
AUDIO
SETUP
5
1234
6
TUNER
TUNING
STRAIGHT
SUR. DECODE
7
8
5
6
9
0
10
1
2
3
4
R
ETUR
N
E
NHAN
C
E
R
S
LEE
P
DIRE
CT
H
DMI
V
A
A
2
3
[
A
]
V
-
V
V
A
UX
M
O
VIE
M
US
I
C
BD
D
VD
R
ADI
O
MUTE
FM
MEM
O
R
Y
AM
P
RE
S
E
T
I
NF
O
4
M
O
DE
ENT
TV
TV
V
OL
TV
CH
T
OP
MENU
PO
P-
U
P
SOU
R
CE
R
E
C
EIVER
CODE SE
T
INPUT
MUTE
D
OC
K
USB
A
UDI
O
S
ETUP
5
1
2
3
4
6
T
UNER
TUNIN
G
S
TRAI
G
H
T
S
U
R
.
DE
CO
DE
HDMI1
VOLUME
When no sound is output from surround
speakers
SW
C
L
SL SR
R
HDMI1
VOL.
SW
C
L
SL SR
R
Volume -30.0dB
VOL.
More various features!
More various functions are available with the unit.
Refer to the “Owner’s Manual” for details on
effective use of the unit.
Connecting external devices
other than BD/DVD players
(p.21)
Various devices, audio players, such as CD players,
video games, camcorders, etc. can be connected to
the unit.
Selecting the favorite sound
programs
(p.33)
You can select various sound programs (CINEMA
DSP) and sound decoders in many different
categories suitable for movies, music, video games,
sports programs, and so on.
Playing songs with your iPod
(p.43)
You can play an iPod with the unit using a USB cable
supplied with the iPod, the Yamaha iPod universal
dock (optional) or an iPod wireless system (optional).
z Listening to FM/AM (p.38)
z Playing back songs with Bluetooth devices
(p.50)
z Playing back songs with USB storage devices
(p.52)
z Changing input settings with a single key
(SCENE function) (p.32)
For more detail, see “What you can do with the
unit” (p.5).
© 2011 Yamaha Corporation YD338C0/ESEN2
  • Page 1 1
  • Page 2 2
  • Page 3 3
  • Page 4 4
  • Page 5 5
  • Page 6 6
  • Page 7 7
  • Page 8 8

Yamaha HTR-4064 Инструкция по применению

Категория
Аудио-видео ресиверы
Тип
Инструкция по применению
Это руководство также подходит для

Задайте вопрос, и я найду ответ в документе

Поиск информации в документе стал проще с помощью ИИ