Hyundai LCD702 Руководство пользователя
- Категория
- ЖК-телевизоры
- Тип
- Руководство пользователя
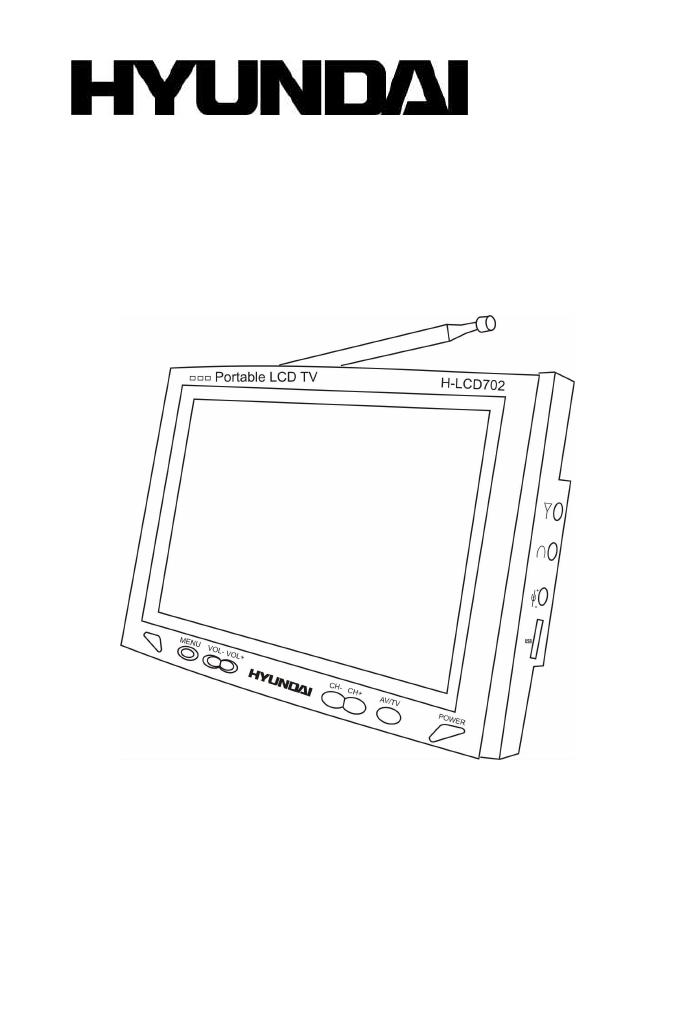
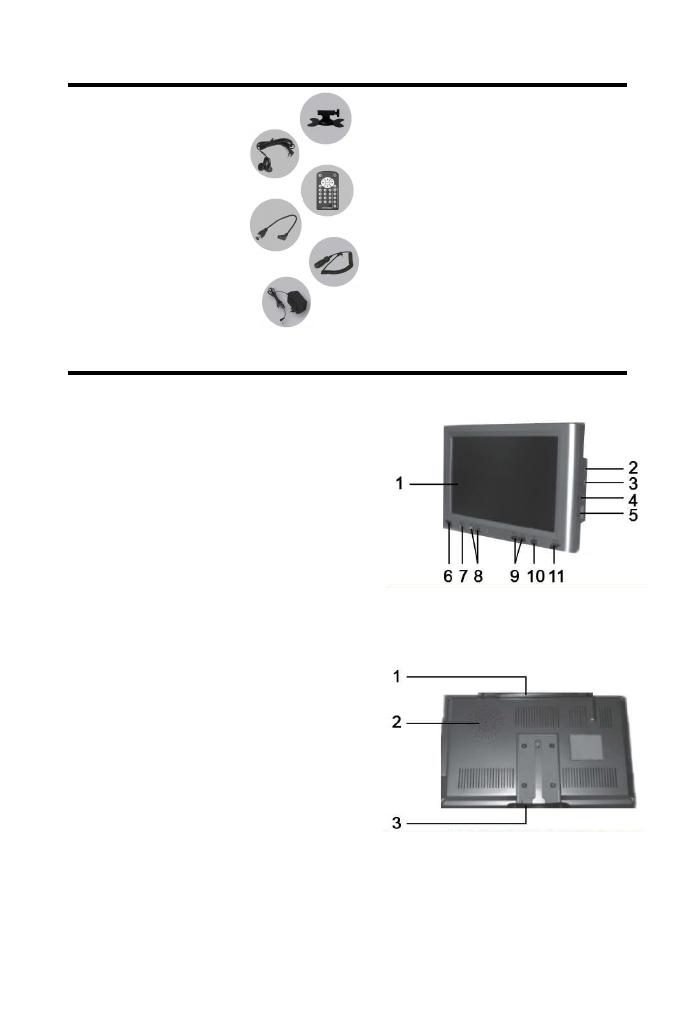
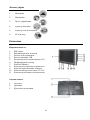
Hyundai LCD702 - это портативный цветной ЖК-телевизор, готовый к использованию прямо из коробки. Его можно использовать как в помещении, так и на открытом воздухе, благодаря встроенной антенне и входящему в комплект адаптеру питания от прикуривателя. Hyundai LCD702 имеет встроенные динамики, а также разъем для наушников, что делает его идеальным для личного просмотра. Вы также можете подключить его к внешним устройствам, таким как DVD-плеер или игровая консоль, с помощью входящего в комплект AV-кабеля.
Hyundai LCD702 - это портативный цветной ЖК-телевизор, готовый к использованию прямо из коробки. Его можно использовать как в помещении, так и на открытом воздухе, благодаря встроенной антенне и входящему в комплект адаптеру питания от прикуривателя. Hyundai LCD702 имеет встроенные динамики, а также разъем для наушников, что делает его идеальным для личного просмотра. Вы также можете подключить его к внешним устройствам, таким как DVD-плеер или игровая консоль, с помощью входящего в комплект AV-кабеля.


-
 1
1
-
 2
2
-
 3
3
-
 4
4
-
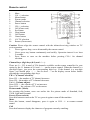 5
5
-
 6
6
-
 7
7
-
 8
8
-
 9
9
-
 10
10
-
 11
11
-
 12
12
-
 13
13
-
 14
14
-
 15
15
-
 16
16
-
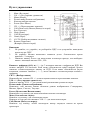 17
17
-
 18
18
-
 19
19
-
 20
20
-
 21
21
-
 22
22
-
 23
23
-
 24
24
-
 25
25
-
 26
26


Hyundai LCD702 Руководство пользователя
- Категория
- ЖК-телевизоры
- Тип
- Руководство пользователя
Hyundai LCD702 - это портативный цветной ЖК-телевизор, готовый к использованию прямо из коробки. Его можно использовать как в помещении, так и на открытом воздухе, благодаря встроенной антенне и входящему в комплект адаптеру питания от прикуривателя. Hyundai LCD702 имеет встроенные динамики, а также разъем для наушников, что делает его идеальным для личного просмотра. Вы также можете подключить его к внешним устройствам, таким как DVD-плеер или игровая консоль, с помощью входящего в комплект AV-кабеля.
Задайте вопрос, и я найду ответ в документе
Поиск информации в документе стал проще с помощью ИИ
на других языках
- English: Hyundai LCD702 User manual
Похожие модели бренда
-
Hyundai LCD804 Руководство пользователя
-
-
-
-
-
-
-
-
Модели других брендов
-
 Sitronics LCD CTV-700 Sl Руководство пользователя
-
Vitek VT-5007 Спецификация
-
Vitek мобильный ЖК-телевизор VITEK VT-5010 Руководство пользователя
-
SoundMax SM-LCD710 Black Руководство пользователя
-
-
 Sitronics LCD CTV-700 Руководство пользователя
-
Vivitek Handheld TV vt-3007 Руководство пользователя
-

